
User Preferences
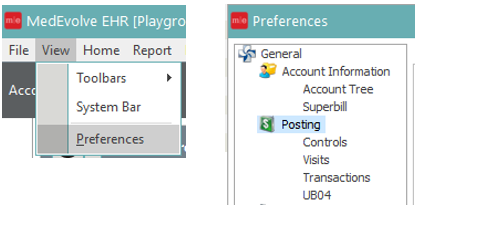
To review or change user preferences, go to View > Preferences. All Posting preferences are available under the Posting option to the left.
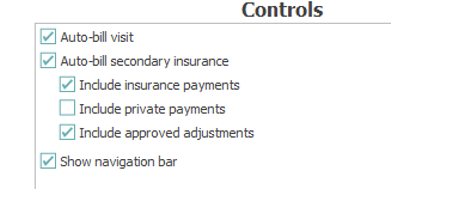
Control Preferences – These are the Close Control options. The options selected here will be the users default Close Control options for all new controls created from this point forward.
Accessing Account Posting Application
From the main screen in MedEvolve, the Posting application can be accessed three different ways:
- Click on “Posting”
- Press CTRL+P
- Click Applications and then click Posting
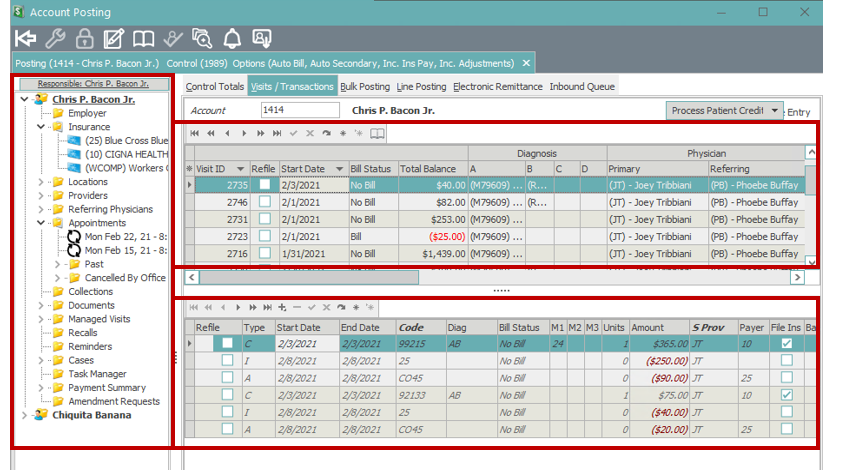
When the Posting application opens, it defaults to the Controls Tab. (# 1 below)
An open control is required to post transactions.
Any open controls will display in the control box. (# 3 below)
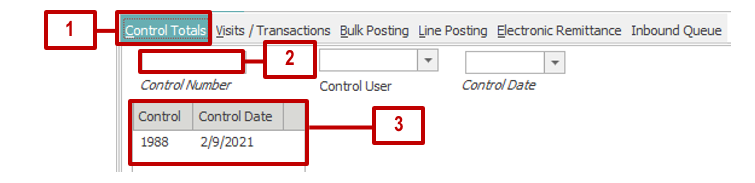
To post charge transactions using an open control:
Type the existing control number into the Control Number field (# 2 above).
Double click on a control located in the control box (# 3 above).
To post transactions using a new control:
Select “New” (Located on the bottom right of the screen) 
When the appropriate control number appears in the Control Number field (# 3 above), charge transactions can now be posted.
Manual Charge Posting
There are two areas in the posting application for manual charge posting
- Visits/Transactions
- Bulk Posting
Visits/Transactions Tab
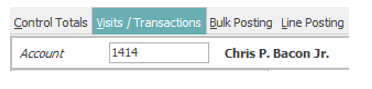
After creating or accessing control, select the Visits/Transactions tab at the top of the Account Posting application.

Load Patient Account
Load the patient account by typing the account number into the account field. To perform a patient search, click the italicized word Account or click into the Account field and press F3.
After the patient account is populated, any previous visits will appear in the upper Visit section of the window. All transactions related to the selected visit will appear in the bottom Transaction section of the window. The Patient Tree will also display to the left.
All columns in both the Visit and Transaction sections can be reordered by dragging and dropping – this is specific to each user. To reset them to the original settings, right click in the appropriate section and choose the option that applies: Reset Visit Columns or Reset Transaction Columns.
Select Visit
Transactions can be posted to an existing visit, a new visit, or a visit created from an existing case or new case.
To post to an existing visit, select the appropriate visit from the top Visit section and then proceed to the next section: Adding Charge Transactions.
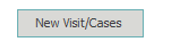
To create a new visit or to create a visit from an existing case or new case, select the New Visit/Cases button in the bottom right of posting application.
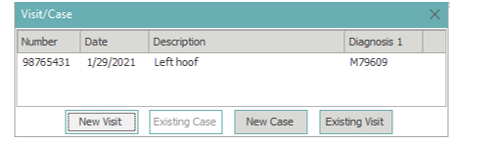
A visit/case pop-up box will appear. See the Visit/Case Pop-Up Overview section for additional details.
Adding Charge Transactions
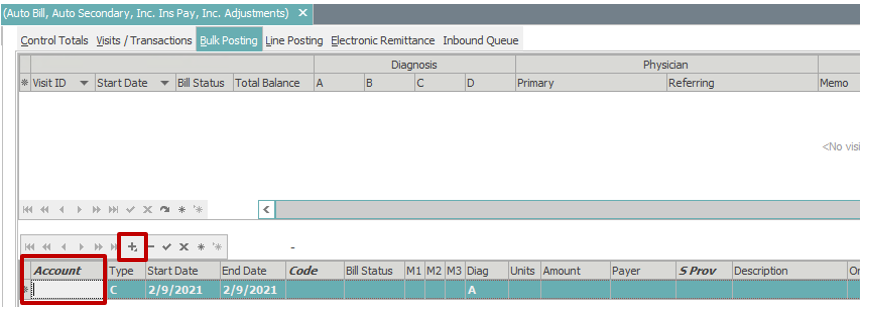
In the Visits/Transactions tab, Charge Entry is the default mode as seen top right corner of the screen.

When in Charge Entry mode, selecting the ‘+’ in the upper-left of the transactions section will add a new charge transaction line to the selected visit.

The type defaults to C for a charge transaction. Fill in the charge transaction details as outlined below.

Charge Transaction Details
Tip: To speed data entry, reorder the columns by dragging and dropping – this is specific to each user. To reset them to the original settings, right click and select Reset Visit Columns.
Start/End Date – Enter the start/end dates, if different from the control date.
Code – Enter the CPT/charge code in the Code field. To perform a CPT/charge code search, click the italicized word Code to search available charge codes.
M1, M2, M3 – Add modifiers to M1, M2 or M3 as needed.
Diag – Add Diagnosis Pointers based on the diagnosis codes added to the visit. (Diagnosis pointers will not default on the first line, as the transaction has to be saved for the system to look at the service dates, compared to the insurance plan ICD-10 effective date, to determine which codes should display on the visit. All transactions lines added after the first line will default to the pointers from line 1, and can be changed as needed)
Units – Update units as needed

S Prov – Add the Service Provider in the S Prov field. If user preferences are set to default the service provider from the visit, the S Prov will auto-populate as the insurance provider when the transaction is saved.

To add a new charge line, keyboard users can press the down arrow on the keyboard. Alternately click Apply and then click .
When finished adding charges for that visit, keyboard users can arrow down and back up to save the last transaction or press F9. Alternately, click Apply to save transactions.

To switch to another patient account, click into the Account field (or press F2) and type in the next account number. Alternately to perform a patient search, click the italicized word Account or click into the Account field (or press F2) and press F3.
Additional Transaction Columns
Amount is auto-calculated based on the fee schedule charge amount multiplied by the number of units
Payer will default the code based on the primary insurance plan enabled on the visit information window. If the patient is responsible, Payer will reflect ‘Account’.
Balance will default when saved and will update as payments/adjustments are posted to the charge transaction.
Description defaults as the description of the CPT/charge code from the related fee schedule table.
On Hold can be used to place a transaction in a ‘hold’ status while waiting for additional information. This will stop a claim from being generated for that transaction. When ‘On Hold’ is released, the claim must be ‘refiled’ to trigger a claim to generate.
Narr – The Narrative folder reflects narrative text for that CPT. For payments/adjustments, the narrative folder contains the ‘Trace Information’ details. Double-click the narrative folder to open and view/add text details. (Red tab on folder indicates there are no narrative details. Green tab on folder indicates narrative items exist.)

NDC reflects the NDC numbers from the fee schedule table for that CPT. If multiple NDC numbers exist for a CPT, a pop-up will appear for the user to select the appropriate NDC number.
Post-Op displays with a green tab if post-op days are active for the CPT code. Double-clicking the Post-op folder will display the pop-up reminder created by the post-op days associated with the CPT code from the fee schedule table.
File Ins is required for any CPT code that needs to be filed on a claim to insurance. Insurance plan(s) must be enabled (have a check mark) on the visit information window. If File Insurance is unchecked, a claim will not be generated for that CPT code, but the code will remain in insurance responsibility/No Bill status until manually changed.

Bill Date reflects the date a transaction switch to a Bill status.
Control Number displays the control the transaction was created in.

Remark Codes will display any remark codes received on an ERA for the related transaction. Remark codes can be viewed by double-clicking the field.

Claim Adj Codes displays any claim adjustment codes received on an ERA for the related transaction. (Double click remark or adj codes to view additional details)
Task will display a link to tasks created from the transaction line. Double-click the task icon to view the task.

Additional Visit Columns
Visit ID displays the unique visit ID assigned when the visit was created. All visits in the same database will have a unique visit id to link ERA’s back to the appropriate visits/transactions.

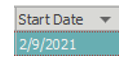
Start Date reflects the oldest transaction start date associated with the visit.
Bill Status reflects the current bill status of the visit. No Bill = the entire visit is still in Insurance responsibility. Bill = the entire visit is currently in patient responsibility. Mixed = some transactions on the visit are in a No Bill status, some transactions are in a Bill status.

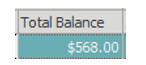
Total Balance reflects the total balance remaining for all transactions on the visit.
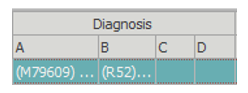
Diagnosis (A,B,C,D) shows up to the first 4 diagnosis codes attached to the visit. Hover over each code to see the description.
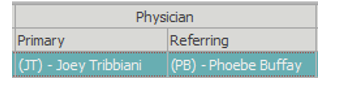
Primary Physician is the Insurance Provider attached to the visit. Hover to see the full name.
Referring Physician is the referring physician attached to the visit. Hover to see the full name.
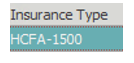
Insurance Type displays the primary insurance type from the visit details screen. HCFA 1500, UB92 or None will be displayed, based on claim type.
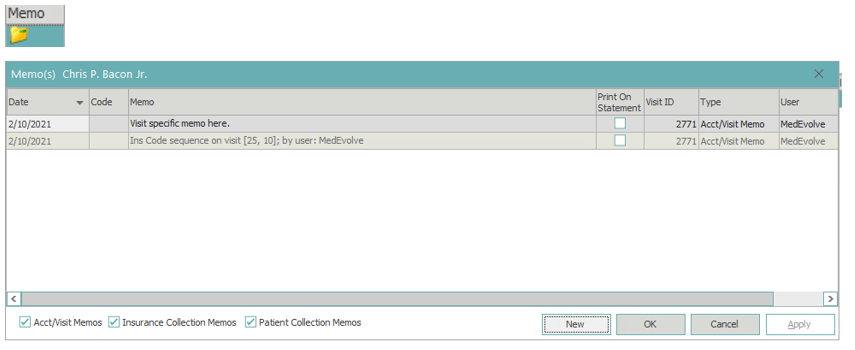
Memo displays any memos from ERA posting, or manually added memos, related to the visit. Double-click the memo folder to view/add memos to the visit.
History displays claim filing history, as well as visit changes that have occurred since the visit was created. (Red Tab on folder = No filing history. Green Tab on folder = Filing history exists) Double click this folder to view all filing history for this visit.

Case Number displays the case number if a case is attached to the visit.
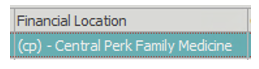
Financial Location displays the financial location code and name attached to the visit.
Charges displays the total charge amount of all charges (transaction type C and CC) posted on the visit.
Insurance Payments displays the total amount of insurance payments (transaction type I and II) posted to transactions on the visit.
Private Payments displays the total amount of private payments (transaction type P and PP) posted to transactions on the visit.
Credit Adjustments displays all credit adjustments (transaction type A) posted to transactions on the visit.
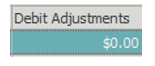
Debit Adjustments displays all debit adjustments (transaction type AA) posted to transactions on the visit.
Remarks will display any remark codes received on an ERA for the related visit. Remark codes can be viewed by double-clicking the field.
Task will display a link to tasks created from the visit line. Double-click the task icon to view the task.
Payments/Adjustments
To post payments or adjustments to a charge in the Visits/Transactions tab, see instructions in the Patient Payment/Adjustment Posting section.
Bulk Posting Tab
Bulk Posting was designed to help with large batch posting jobs, such as stacks of superbills.
Note: Patient payments must be posted immediately following the charge to which it should be applied.
After creating a new control or loading an existing control, select the Bulk Posting tab at the top of the Account Posting application.

Load Patient Account
Start by selecting the + icon in the upper-left of the transactions section.
A new charge line will appear.
Load the patient account by typing the account number into the account field. Alternately to perform a patient search, click the italicized word Account or click into the Account field and press F3.
Select Visit
After the patient account is loaded, a visit/case pop-up box will appear. See the Visit/Case Pop-Up Overview section for additional details.
Adding Transactions
After a new visit is created or an existing visit is selected, enter the charge transaction details according to the instructions from the earlier section: Manual Charge Posting > Charge Transaction Details.
Note: If there is a patient payment, it must be posted immediately following the charge to which it should be applied.
To add an additional transaction – charge or payment, keyboard users can press the down arrow on the keyboard. Alternately click Apply and then click the + icon.
The transaction type defaults to C, but it can be freely typed over with a P to post a patient payment transaction.

Enter the start/end dates, if different from the charge date.
Enter the payment code in the Code field. To perform a payment code search, click the italicized word Code in the column header.
Enter payment amount in the amount field.

When another transaction line is added, the type will default back to C.
When finished adding all charges and payments for that patient/visit, arrow down and enter the next account number in the account field. Alternately to perform a patient search, click the italicized word Account or click into the Account field and press F3.

When finished adding all transactions in Bulk Posting, keyboard users can arrow down and back up to save the last transaction or press F9. Alternately, click Apply.
Patient Payment/Adjustment Posting
Select the Visits/Transactions tab at the top of the Account Posting application.

Posting to Selected Charge Transaction
Go to the appropriate visit and right click on the appropriate charge transaction. Select Pay/Adj Mode. Keyboard users can highlight the transaction and press F8.
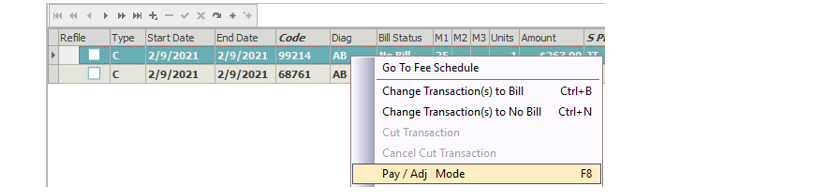
Pay/Adj Entry is now displayed in the top right corner of posting application.

A new transaction line was inserted below the selected charge transaction and any other charge transactions are hidden from view.

The type field is now blank. Enter P for patient credit payment or A for credit adjustment. For reversals, debit payments or debit adjustments, use PP for patient debit payment and AA for debit adjustment.
In the code field, enter the payment or adjustment code. To perform a code search, click the italicized word Code in the column header.
In the amount field, enter the payment or adjustment amount. For check payments, check number can be manually added to the end of the description line.

To save, select Apply in the bottom right corner of posting application or press F9.
To return to charge entry mode, press F8 or right click the transaction and uncheck Pay/Adj Mode.
Auto Visit Distribution
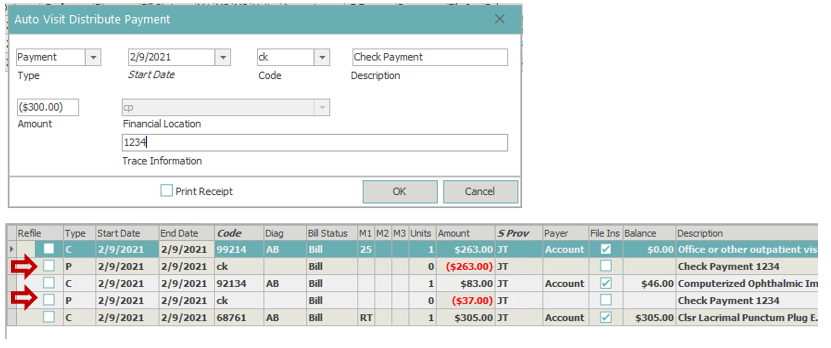
The auto visit distribution function will distribute the payment across the selected visit. Money is applied to the first listed charge transaction’s balance and if any money is leftover, it will apply it to the next charge transaction and so on until there is no money left to apply. The system will auto-create the necessary payment transaction(s).
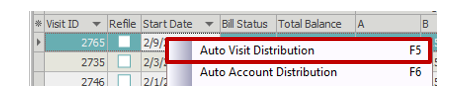
Right click on the visit and select Auto Visit Distribution. Keyboard users can highlight the visit and press F5.
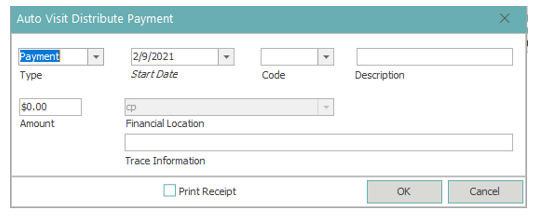
In the payment pop-up window, type defaults to payment.
Start date – update if necessary
Code – enter payment code
Amount – enter payment amount
Trace information – this is where a check number can be referenced
Select OK and the system will auto-create the necessary payment transaction(s)
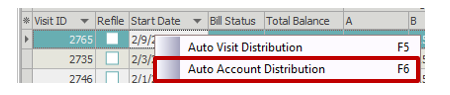
Auto Account Distribution
Auto account distribution distributes the payment across the account – starting with the oldest bill balance. If there is remaining money, it is applied to the next oldest bill balance and so on until no money remains. The system will auto-create the necessary payment transaction(s).
Right click on any visit and select Auto Account Distribution. Keyboard users can highlight any visit and press F6.
The payment pop-up window has the same fields as the Auto Visit Distribution payment pop-up window.
For an easy way to find which visits the money was applied/payment transaction(s) were created, go to the control totals tab and look at the visit id field(s) of the payment transaction for that patient account.

Unapplied or Deposit Payments
Select the Visits/Transactions tab at the top of the Account Posting application.

Manual Unapplied Or Deposit Payment Posting
To manually post an unapplied or deposit payment, a visit is required. It can be posted to an existing visit, a new visit, or a visit created from an existing or a new case.
Select Visit
To post to an existing visit, select the appropriate visit from the top Visit section and then proceed to the next section: Adding Unapplied or Deposit Payment Transaction.
To create a new visit* or to create a visit from an existing case or new case, select the New Visit/Cases button in the bottom right of posting application.
A visit/case pop-up box will appear. See the Visit/Case Pop-Up Overview section for additional details.
* Note: When creating a new visit for unapplied or deposit payments – generally only the required fields (Service Location, Financial Location and Insurance Provider) are entered.
Adding Unapplied or Deposit Payment Transaction
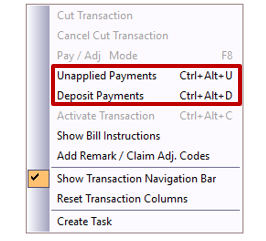
In the bottom transaction section, right click and select either Unapplied Payments or Deposit Payments. Keyboard users can press Ctrl+Alt+U for Unapplied Payments or Ctrl+Alt+D for Deposit Payments.
The system generates a charge transaction line with a system charge code of UNAPP for unapplied payments and DEPOSIT for deposit payments. These codes act as placeholders until the actual charge code is ready to be posted.
The system also switches to Pay/Adj Entry mode and inserts a new transaction line below the charge line.

The type field is now blank. Enter P for patient payment.
In the code field, enter the payment code. To perform a payment code search, click the italicized word Code in the column header.
In the amount field, enter the payment amount. For check payments, the check number can be manually added to the end of the description line.
To save, select Apply in the bottom right corner of posting application or press F9.
To return to charge entry mode, press F8 or right click the transaction and uncheck Pay/Adj Mode.
Posting a Charge to Unapplied or Deposit Payments
Unapplied or deposit payments are posted using a system charge code – UNAPP or DEPOSIT. These codes act as placeholders until the actual charge code is ready to be posted. In order to associate a charge transaction to the payment, the transaction must be activated.
Right click on the unapplied or deposit transaction and choose activate transaction. Keyboard users can press Ctrl+Alt+C.

A pop-up will ask if the visit entry date should be updated. This is referring to the entry field in the top left corner of the visit information screen.

The placeholder code – UNAPP or DEPOSIT – is removed.

Enter the charge code and select Apply in the bottom right corner of posting application or press F9

Electronic Charge Posting
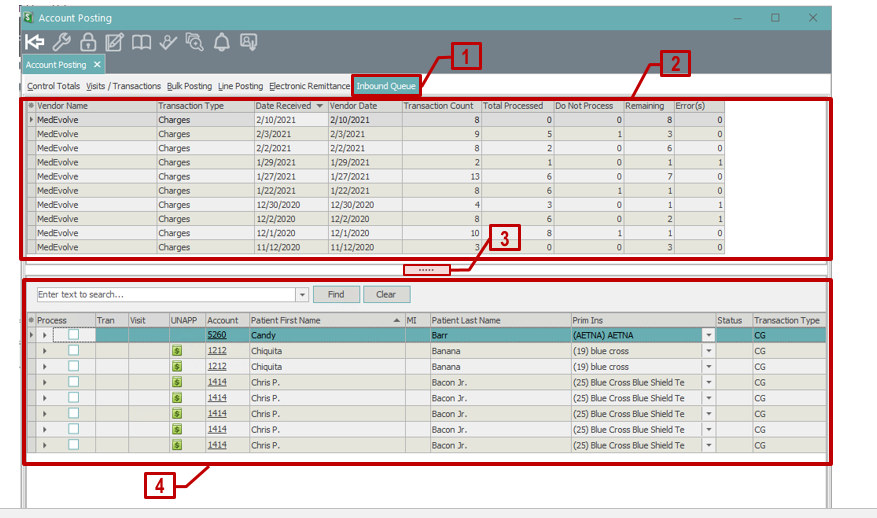
Charges sent from a third party vendor to MedEvolve (via HL7 interface) are received in the Inbound Queue tab. A control does not need to be opened to begin working in the Inbound Queue. Corrections can be made to the transaction details in the Inbound Queue before processing them into a control.
Select the Inbound Queue tab at the top of the Account Posting application.

The top section of the inbound queue separates the transactions into groups by date received. This section can by hidden or minimized by clicking or dragging the three dots between the top & bottom sections.
The bottom section of the inbound queue displays the transactions associated with the selected transaction group.
Views
The default view in both the top and bottom sections shows the unprocessed groups/transactions and hides the processed groups/transactions. To change the view in either area, right click anywhere in that area and choose from the drop-down menu.

View All Charge Transactions
To view all charge transactions in a single view, right click in the bottom transaction section and select 
To return to the group view, right click and select 
Column Functions
All columns in the inbound queue can be:
- Reordered by clicking and dragging the column header of the specified field – this is specific to each user. To reset them to the original settings, right click in the appropriate section and select Reset ‘Inbound Queue’ Grid Columns.
- Sorted by clicking on a column header to toggle between ascending order and descending order (notice the direction of the arrow).

- Filtered by hovering on the column header and selecting the funnel icon that appears on the right side of the header.

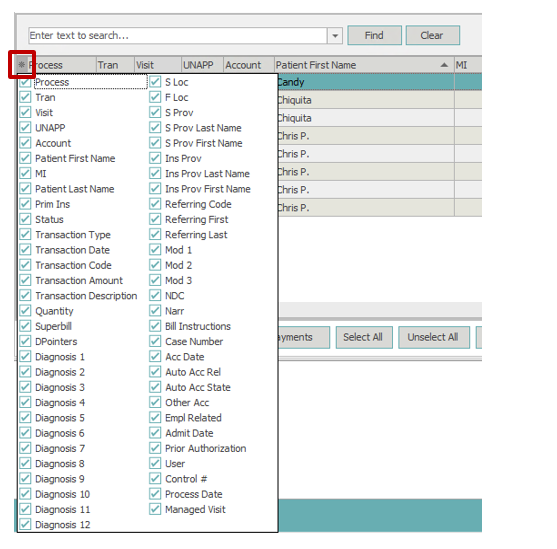
The columns in the bottom transaction section can also be reordered (specific to each user) by selecting the asterisk in the upper left corner of the bottom section. A drop-down box will appear with a list of all the columns in the bottom section. Click and drag the column name to reorder. Columns can also be hidden from view by unclicking the box next to a column name.
Column Details
Process – Place a checkmark in the box for the transactions that are ready to be processed into a control.
Tran – In the unprocessed view, this field is blank. In the processed view, this field will display an icon. When the icon is double clicked, the Account Visits window will open to the visit on which the charges were created and the selected charge will be highlighted in the transaction section.
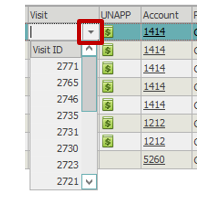
Visit – Unprocessed charge transactions can be added to existing visits if necessary. The drop-down arrow will display all existing Visit ID numbers for the selected patient. Select the appropriate Visit ID number. When the charge is processed into a control, it can be found on the selected Visit ID.
UNAPP – If an account has unapplied or deposit payments, an icon will display in this field.
To apply an unapplied or deposit payment to a specific charge transaction, double click the icon of the charge transaction line that needs to take the place of the UNAPP or DEPOSIT code. Place a checkmark in the UNAPP box on the line with the correct UNAPP or DEPOSIT payment.
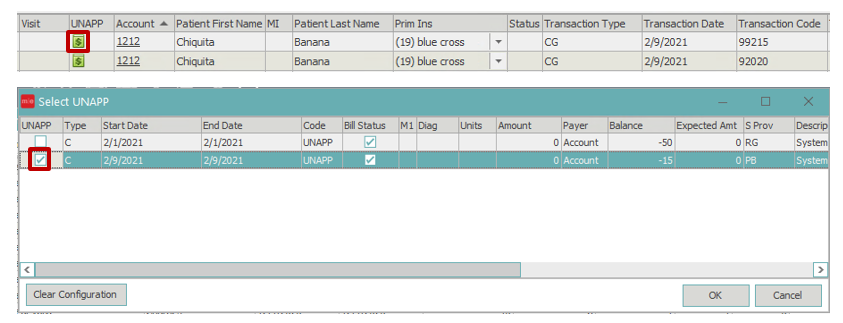
The visit ID of the unapplied or deposit payment will appear in the visit column of the selected transaction as well as any other charges received on that same visit.

When charges are processed into a control, the system will merge the inbound queue charges with the existing unapplied or deposit payment visit.
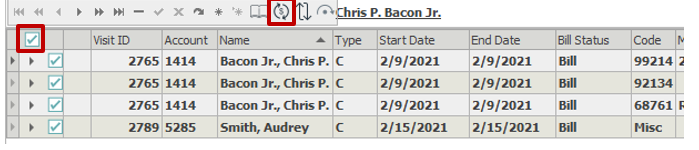
View of transactions from Visits/Transactions screen showing unapplied payment (before applying unapplied payment in inbound queue)

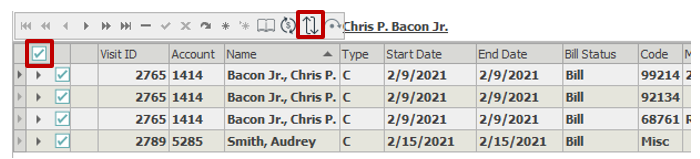
View of transactions from Visits/Transactions screen after applying unapplied payment in inbound queue

Account – Patient account number. Double click the account number to open that patients Account Information.
Patient First Name – Displays patients first name
MI – Displays patients middle initial
Patient Last Name – Displays patients last name
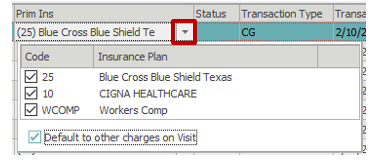
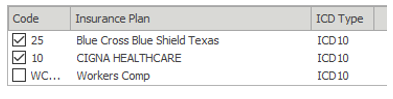
Prim Ins – The primary insurance is displayed. Click the arrow on the right to view any other insurance plans that were active on the patients account when the transaction was received in the inbound queue. Plans can be reordered or disabled from here.
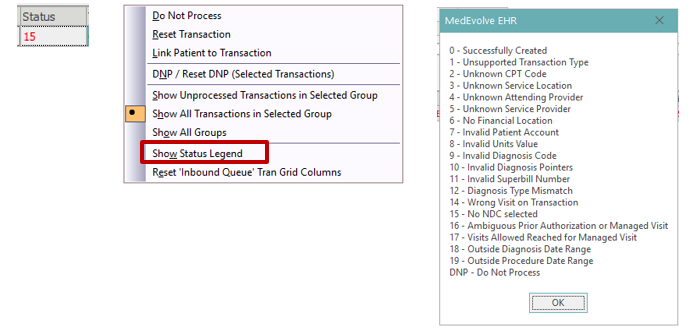
Status – If the system detects an error when processing the charges, this field will display an error code number that can be mapped to the Status legend in the transaction section right click menu. Also if a transaction is marked as Do Not Process, this field will display DNP when in the processed view.
Transaction Type – CG means a charge transaction
Transaction Date – Date of Service
Transaction Code – CPT/charge code
Transaction Amount – Transaction amount will not populate until the charge is processed into a control and is associated with a fee schedule. The transaction amount can then be seen on the control totals screen.
Transaction Description – Transaction description will not populate until the charge is processed into a control and is associated with a fee schedule. The transaction description can then be seen on the control totals screen.
Quantity – Units of service
Superbill – A superbill number can be typed here
DPointers – Diagnosis Pointers
Diagnosis columns 1 – 12 – Diagnosis Codes
S Loc – Displays Service Location code from MedEvolve Location Table. To change Service Location code, click into field and press F3.
F Loc – Displays Financial Location code from MedEvolve Location Table. To change Financial Location code, click into field and press F3.
S Prov – Displays Service Provider code from MedEvolve Resource Table. To change Service Provider code, click into field and press F3.
S Prov Last Name and S Prov First Name – Displays Last and First name associated with the Service Provider code from MedEvolve Resource Table
Ins Prov – Displays Insurance Provider code from MedEvolve Resource Table. To change Insurance Provider code, click into field and press F3.
Ins Prov Last Name and Ins Prov First Name – Displays Last and First name associated with the Insurance Provider code from MedEvolve Resource Table
Referring Code – Displays Referring Physician code from MedEvolve Referring Physician Table. To change Referring Physician code, click into field and press F3.
Referring First, Referring Last – Displays Last and First name associated with the Referring Physician code from MedEvolve Referring Physician Table
Mod columns 1 – 3 – Modifiers
NDC – If an NDC number(s) exists in the Fee Schedule Table for the selected CPT, the number(s) can be seen by selecting the drop-down arrow.
Narr – Transaction narrative folder data will not populate until the charge is processed into a control and is associated with a fee schedule.
Bill Instructions – Displays billing notes received from third party vendor. Users can also add or modify notes.
Case Number – If a case exists on the account, a drop-down arrow will appear in the field.
Acc Date – Accident Date
Auto Acc Rel – When checked, this will mark claim as auto accident
Auto Acc State – Accident State
Other Acc – When checked, this will mark claim as other accident
Empl Related – When checked, this will mark claim as employment related
Admit Date – Hospital admission date
Prior Authorization – Prior authorization or referral number
User – When viewing processed transactions, this field will display the user ID that processed the charge.
Control # – When viewing processed transactions, this field will display the control number of the processed charge.
Process Date – When viewing processed transactions, this field will display the date and time the charge was processed.
Managed visit – If a managed visit exists on the account, a drop-down arrow will appear in the field.
Review and Process Charges
Review charge transactions and make any necessary edits or corrections.
To process transactions into a control:
- Place a check mark in the box in the process column.
Or to select all the transactions within a transaction group, click the Select All button in the bottom left corner.
- Click the Create Charges button in the bottom left corner.
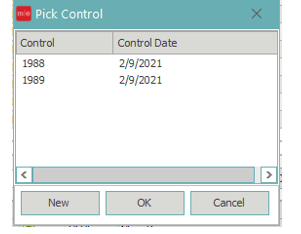
When the Pick Control window appears, choose where to place the transactions – select an existing control or select the New button for a new control.
Close Control Overview
The Close Control process creates the claim file that will be sent to the clearinghouse when the Daily Process is run.
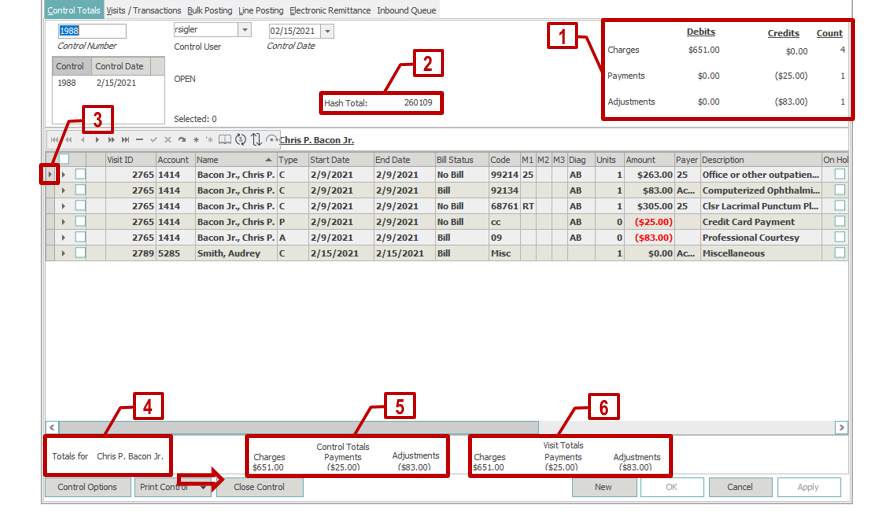
Go to the Control Totals tab.

Review the control
Corrections can be made to the transaction details in the Control Totals tab.
The information can be sorted by clicking on a column header to toggle between ascending order and descending order (notice the direction of the arrow).

Scrub transactions – Place a checkmark next to each transaction to be scrubbed or select the box in the column header to select all. Then select the Scrub Transactions icon.
Move Transactions – Place a checkmark next to each transaction to be moved. Then select the Move Transactions icon.
When the Pick Control window appears, choose where to place the transactions – select an existing control or select the New button for a new control.

Balance the Control
Below are a few options to assist in balancing controls.
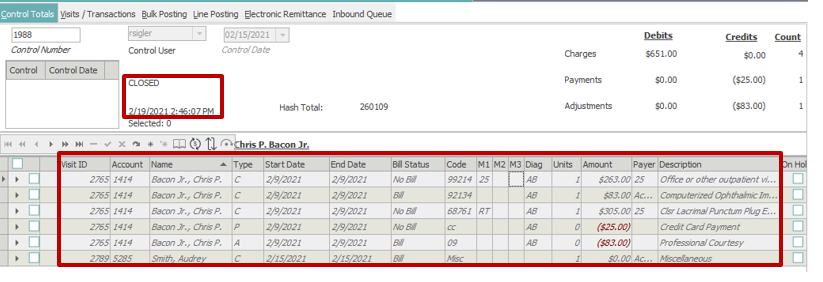
Batch Totals – (# 1 Below) Totals the debit and credit dollar amounts as well as the total transaction count for each of the following transaction types: charges, payments and adjustments.
Control Totals and Visit Totals – when any patient transaction is selected (# 3 below), the Controls Totals (# 5 below) and the Visit Totals (# 6 below) are displayed for the selected patient (# 4 below).
Hash Total – (# 2 below) Totals the numeric values of all the CPT Codes, which aids in verifying that all CPT codes have been posted.
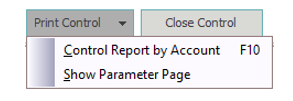
Print the Control
From the bottom left, select Print Control. There are two options. The default report is Control Report by Account. Or to choose different parameters, select the Show Parameter Page option.
Close the Control
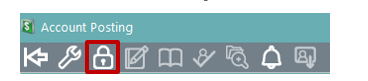
There are four ways to close the control:
- Click the Close Control Icon in the Posting Toolbar.
- Right click anywhere in the Control Totals screen and select the Close Control option

- Press F11
- Click the Close Control button in the bottom left of the Control Totals screen

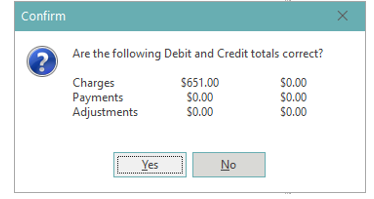
A confirmation pop-up will appear. Select Yes to confirm that the Debit and Credit totals on Charges, Payments and Adjustments are correct.
The Control Options pop-up defaults to the options set up in the User Preferences > Control Preferences section. A user can change the Control Options for this specific control.
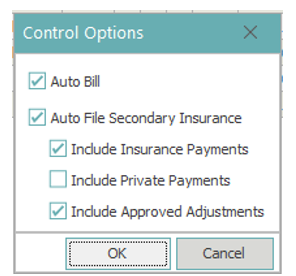
After selecting OK on the Control Options pop-up, the Control will be finalized and closed. No additional transactions can be added, and existing transactions will appear in gray instead of black and, for the most part, cannot be changed.
The word ‘CLOSED’ along with the date and time the control was closed will be stamped to the right of the open controls box.
Appendices
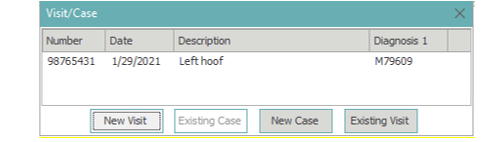
Visit/Case Pop-Up Overview
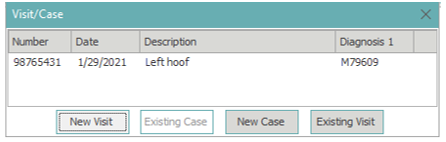
From the Visit/Case pop-up, the options are New Visit, New Case, Existing Case** or an Existing Visit.
New Visit – when selected, a Visit Information window opens. Complete relevant fields* in the Visit Information window and select OK from the bottom right corner. Keyboard users can press F8 to apply changes and close window. See the Visit Information Window Overview for additional Visit Information details.
* Note: For unapplied or deposit payments – generally only the required fields (Service Location, Financial Location and Insurance Provider) are entered.
Existing Visit – when selected, choose the appropriate visit from the top Visit section and then proceed to the next section.
** Existing cases – If a case exists on this account, the existing case will display in the center of the pop-up. To choose an existing case, highlight the case and select the Existing Case button or double left click on the case. The system will automatically create a visit populated with the information from the case details. To view or edit the visit information details, double left click on the visit or highlight the visit and select the book icon.
New Case – when selected, a new Patient Case window will open. Complete the case details, then select OK in the bottom right corner or press F8 to apply changes and close window. The system will automatically create a visit populated with the information from the case details.
Visit Information Window Overview
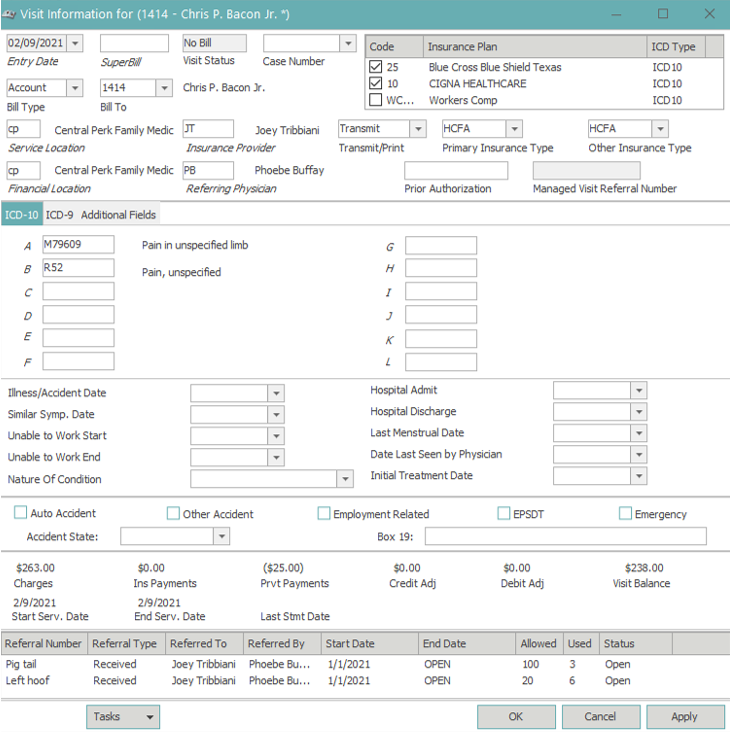
Entry Date pulls from the Control Date.
Superbill – a superbill number can be referenced here.
Visit Status will populate after the visit is created as ‘Bill’ or ‘No Bill’. Bill, if the patient is the responsible payer for the visit, No Bill if insurance is the responsible payer.
Case Number – if visit was created from a new or existing case, the Case Number will display here
Bill Type – when creating a New Visit, Bill Type defaults to ‘Account’. There is the option to change to Employer from the drop-down. If a visit is created from a new or existing case wherein the Bill Type on the case is set to Employer, then the Bill Type will pull in Employer.

Bill To – this field corresponds with the Bill Type field. It displays the name of the account or employer that will receive a statement for the visit. For grouped accounts where a different account is marked as the responsible party, the Bill To field will default to the responsible party.
Insurance plans – The active insurance plans for the date of service will appear at the top-right of this window. This is used to disable or enable insurances as needed per visit. Most often used in a workers comp or DME scenario where primary payers should not be billed on the claim, based on the situation.
Transmit/Print, Primary Insurance Type and Other Insurance Type are defaulted from the insurance categories associated with the insurance plans on the visit. Never change these options, as that can affect claim filing.

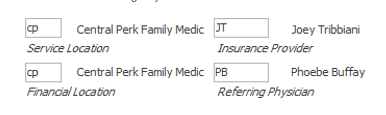
Service Location is a required field. Enter the code, or search by clicking the italicized word.
Financial Location is a required field. Enter the code, or search by clicking the italicized word.
Insurance Provider is a required field. Enter the code, or search by clicking the italicized word.
Referring Physician, if required for the claim, is populated by entering the referring physician code, or searching and selecting referring physicians by clicking the italicized word Referring Physician.
ICD-10 tab provides up to 12 diagnosis codes to be sent on the claim. Enter each diagnosis code – without decimals – in the appropriate lettered field.
To perform a diagnosis code search, click the italicized letter next to the appropriate diagnosis field. This will search the diagnosis code table in MedEvolve.
Note: By default, the diagnosis code table contains only the most commonly used diagnosis codes across all specialties. So there may be circumstances where diagnosis codes need to be added to the diagnosis code table.

Accident claim – If this were an accident related claim, enter any accident related information in the following section.

Once all relevant claim information has been entered on this visit, select OK from the bottom right corner. Keyboard users can press F8 to apply changes and close window.