Accessing insurance payment posting
From the main screen in MedEvolve:
- Click on “Posting”
- Press CTRL+P
- Click Applications and then click Posting
Additional Information
Once you access Account Posting, you will automatically be on the Controls Tab. (See Below)

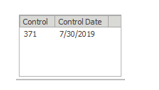
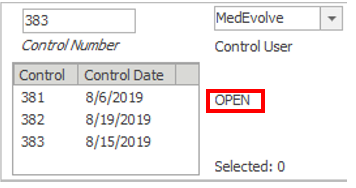
All payments must be posted in an open control. If you have any open controls, they will display in the control box. (See Below)
If you want to post payments using an open control:
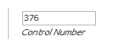
- Click “Control Number”(located on the top left of the screen) and manually type in the number
 or
or - Double click on a control located in the control box.
If you want to post payments using a new control:
- Select “New” (Located on the bottom right of the screen)

When your control number is being displayed in the Control Number field, you are ready to move on to the next step of posting insurance payments.
Posting insurance payments from line posting
Click the Line Posting tab from Account Posting.

Type the account number in the Account field, or click the italicized word Account to search for the patient account you need to post a payment to.

After loading your account:
- Left-click the visit where you need to post the payment. (Black arrow will point to the visit you’ve selected)
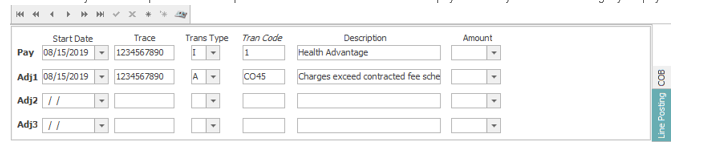
- In the ‘Line Posting’ tab, complete the Pay, Adj1 and Adj2 lines in the middle as needed.
Start Date = Payment Date.
Trace = Check Numbers (Not on Control Totals Report).
Trans Type = I for Insurance Payment or A for Adjustment.
Tran Code = Insurance Code for which you are posting the payment.
Description = Description of Tran Code (Enter check number here if needed on Control Totals report).
Amount = Only used to help balance if multiple transactions are associated with the payment and you need a warning if your payments don’t match.
The Pay line corresponds with the Payment column in the transaction section at the bottom.
The Adj1 line corresponds with the Adjustment1 column in the transaction section at the bottom.
The Adj2 line corresponds with the Adjustment2 column in the transaction section at the bottom.
The Adj3 line corresponds with the Adjustment3 column in the transaction section at the bottom.
Enter your payments and adjustments to each charge transaction as needed.

To save, click Apply, or press F9. The payments and adjustments will move below the corresponding charge lines when applied.

If the patient has a secondary insurance, you’ll need to add Coordination of Benefits details to the COB tab after you’ve saved your Line Posting payments and adjustments. The COB tab is located in the middle section, on the right side.

Complete line 1, 2 and 3 as needed.
Line 1 should contain your allowed amount.
Lines 2 and 3 are used for any PR codes needing to transmit to the secondary payer.
Amount is only used to help balance each line with the corresponding columns at the bottom.
Populate your Start Date, Adj Code, Amount (if needed) Description and Insurance on each line.
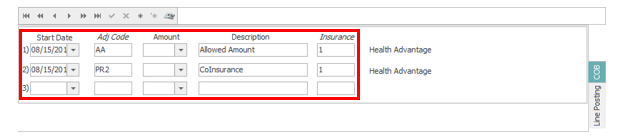
Line 1 corresponds with the UnCalc 1 column in the transaction section at the bottom. (Allowed Amount)
Line 2 and Line 3 correspond with UnCalc 2 and UnCalc 3. (PR1, PR2, PR3)

Enter the amounts needed for each column, for each charge line.
The sum of UnCalc 2 and UnCalc 3 should equal your remaining balance for each charge line.
After entering the needed information, click Apply or press F9 to save and the COB details will display in the black arrow next to each charge line.

If COB is missing from manual insurance payments, and a secondary insurance exists, the secondary claim will be stopped in Unprocessable Claims as ‘Secondary Claim Unbalanced’, if that claim rule is active.
After posting the payment details for your current patient, click on the Line Posting tab in the middle section, then enter the next account number or search for the next patient as needed.
The check details will remain in the middle section, with the assumption that there are multiple account payments on the EOB so users will not be required to enter the pay/adj1/adj2 lines for every account.
Posting Insurance payments from Electronic Remittance
Electronic remittance houses all ERA’s that have crossed from the clearinghouse into MedEvolve.
To access Electronic Remittance, click the Electronic Remittance tab at the top of Account posting.

All ERA’s that have not been processed will appear in the list.
Before posting/processing an ERA, you’ll need to view the ERA to ensure there are no issues with auto-posting.
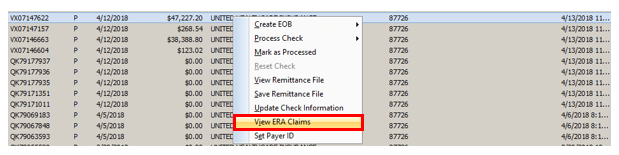
Right-click the ERA, then select View ERA Claims
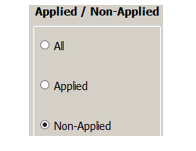
View any items that are ‘False’ by selecting the Non-Applied
If no claims are displayed, you can close the ERA viewer and move forward with posting.
If claims are displayed as Non-applied, click View at the bottom-left corner to see what the issue is.
View the payments and adjustment details. Any payments or adjustments with an ‘N’ beside them will not auto post. This will flag the Non-applied option on the ERA.
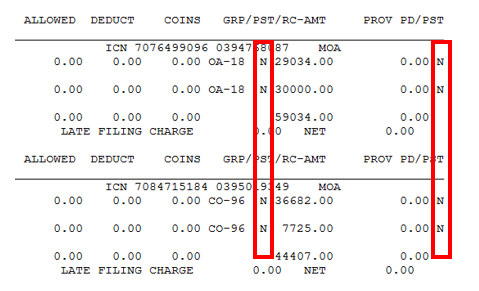
Most ‘N’ transactions are due to denials, or only referencing items primary has processed. This could also be caused by the ERA payer ID not being attached to the insurance plan, or by Remittance Preferences not including the listed adjustment code.
If there is an issue with the ERA payer ID, you’ll see a message below the transaction like the following:

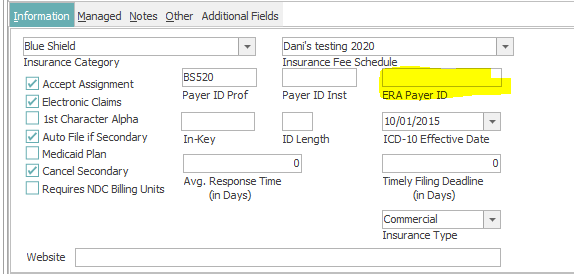
If this is displayed, close the remit and the ERA. The ERA Payer ID is located on the Electronic Remittance tab, on the same row as the check details.

To add the payer id to the plan, go to one of the patient accounts listed on the ERA, double-click the insurance plan from patient tree, then click Show Plan at the bottom-left.
The insurance plan will display, allowing you to add the ERA payer id to the plan.
Once added, you can view the ERA again from Electronic Remittance, at which point you should no longer see the same reason not posted issue. (Unless the payer has multiple plans in MedEvolve, then you may need to update other plans associated with that payer as needed.)
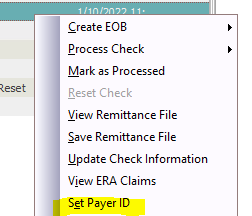
You can also update the check payer id in the case there are multiple insurance plans under the same payer on the same ERA. Right-click the ERA, and select Set Payer ID.
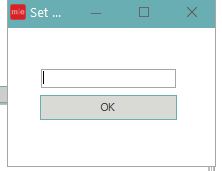
Enter the payer ID you need to reflect on the check and click OK.
When all issues are addressed and you are ready to post your ERA, right-click the ERA and select ‘Process Check’.
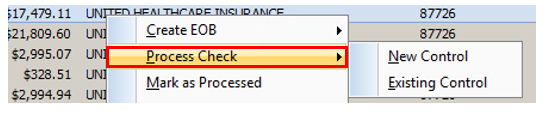
Choose New or Existing Control
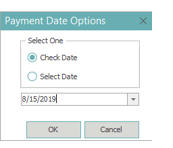
Choose to post the ERA by the Check Date, or by manually selecting a date, then click OK.
The ERA will post to the selected control type and be available in Control Totals for you to balance and make edits as needed.
The check will be marked ‘Completed’ in Electronic Remittance.
All ‘Completed’ or ‘Processed’ ERA’s will disappear from the default view of Electronic Remittance within 24 hours.
Balancing Payments and Closing Controls
When you are finished posting payments, regardless of the tab you’re using to post, you’ll need to balance and close the control containing those payments.
Click on the Control Totals tab in Account Posting.
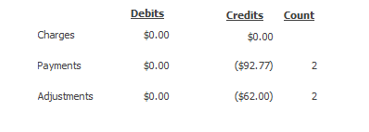
Your total payment amount will appear at the top-right corner of control totals.
If you need to make adjustments to payment amounts, or payment codes, you can adjust these in Control Totals as needed. This is only available while the control is in an ‘Open’ status at the top-left corner of control totals.
After editing and balancing your control, you can print the control, if needed, by selecting ‘Print Control’ at the bottom-left corner of Control Totals.
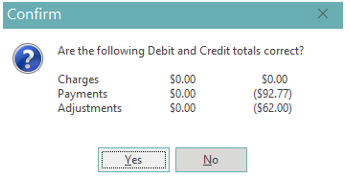
To finalize your control, click Close Control at the bottom-left corner of Control Totals. 
A pop-up will appear for you to confirm that your control is balanced.
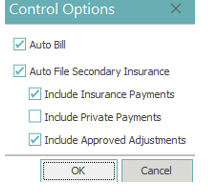
After selecting ‘Yes’, another pop-up will appear with Control Options.
Click OK if additional options aren’t needed. (If user preferences are set up prior to posting, these will default as needed)