Step 1: Right click on the appointment slot you want to schedule the patient in and hover over “Schedule Appointment”.
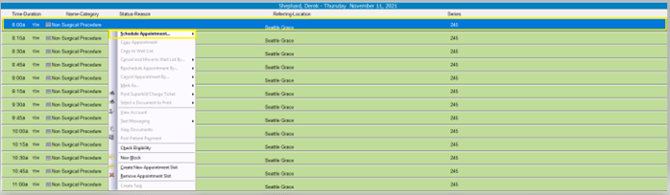
Step 2: Choose one of the following options: With Patient Account Number, Search for Patient, From Wait List, or select one of the last 10 accounts you have recently accessed.

Step 3: Follow one of the steps below, depending on which method you use to schedule the patient’s appointment.
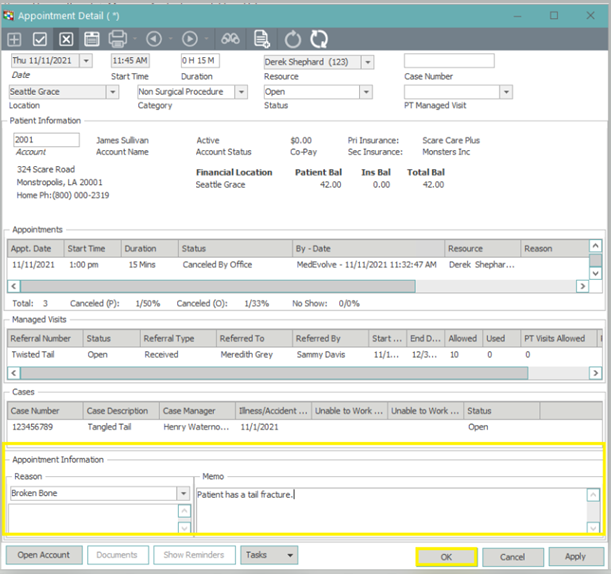
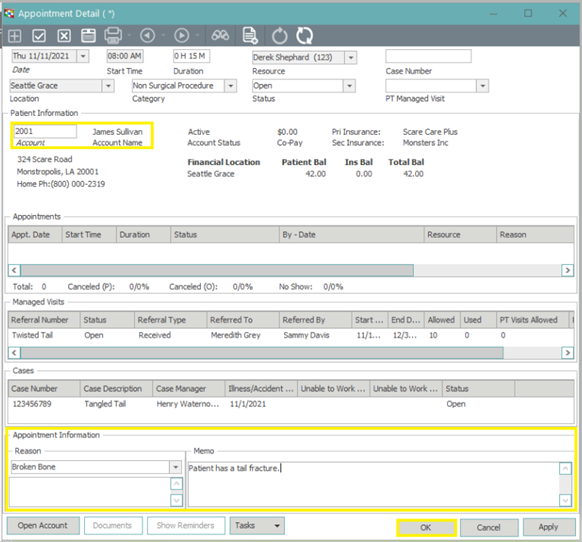
When scheduling an appointment using “With Patient Account Number”, you will be directed to the Appointment Detail window, where you will enter the account number in the Account field. Complete the appointment detail information as needed, and then click “OK” to return to the Scheduler.
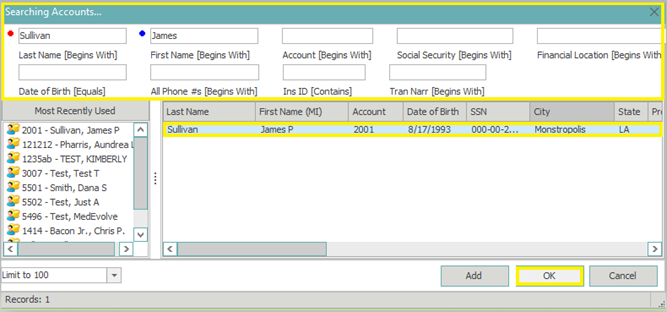
When scheduling an appointment using “Search for Patient”, the patient search window will appear, allowing you to search for and select the appropriate patient as needed. When the patient is selected, you will be directed to the Appointment Detail window. (NOTE: If the patient you are searching does not exist, you can click Add in the patient search window to be directed to Account Information where you can register the patient as usual.) Complete the appointment detail information and then click “OK” to return to the Scheduler.

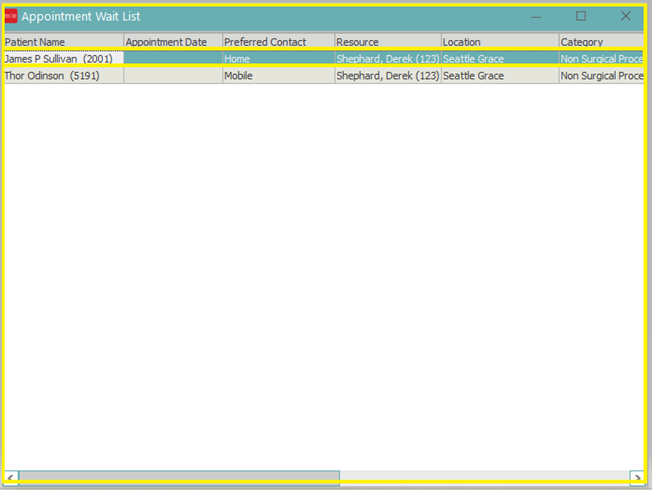
When scheduling an appointment using “From Wait List”, you will be presented with the current wait list patients based on the Resource, Location and Category selected in the Scheduler. Double click on the patient name from the wait list, then you will see a popup for you to confirm that you are moving the patient from the waitlist into the appointment slot. Click “OK” to truly schedule the appointment.

When scheduling an appointment with one of the last 10 accounts you have recently accessed, double left-click the patient name from the list. You will be directed to the appointment detail window to complete scheduling. Complete the appointment detail information as needed, and then click OK to return to the Scheduler.