
All Screenshots taken from Playground Environment.
MedEvolve Collection Module allows users to determine which accounts get moved into a collections incident. It is intended to be used for internal collections that if not resolved will be sent to an outside collections agency. There are several factors which play a role on when the patient will be put into a collections incident including, minimum patient balance, minimum statement count, number of days past due, no pay days, and how long since the last open incident on patient account. It must match ALL of the selection criteria to be put into collections incident.
To set up A collections series:
- Go to Manage Tab
- Select Collections
- Select Series and Levels
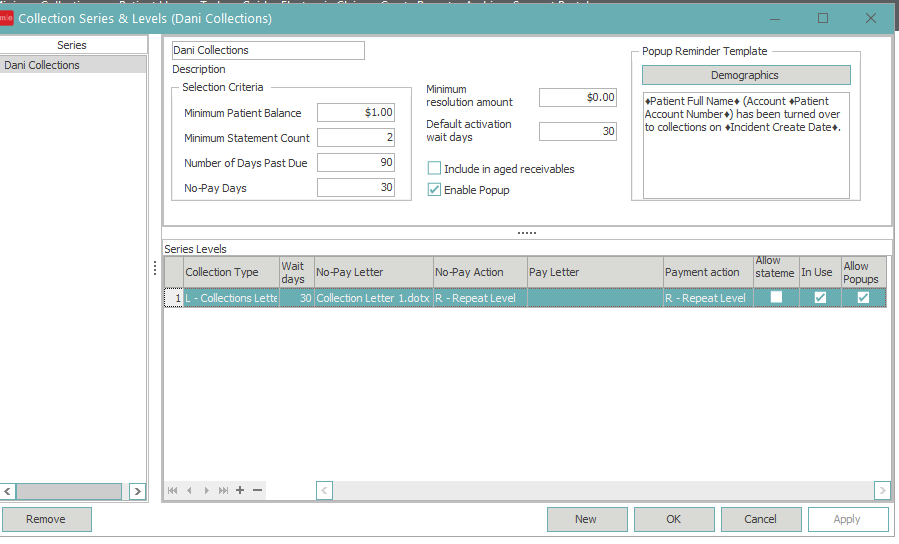
- The following window will appear. Any collections series already created will appear on the left hand side in Series.
- Click New
- In Description type the name of the Series
- Selection Criteria - Used to Determine which accounts will be put into a collection incident
- Minimum Patient Balanace - How low of a balance do you want to be considered for collections?
- Minimum Statement Count - How many statements do you wish the patient to receive for that balance beofre being considered for collections?
- Number of Days Past Due - How many days since the amount was flipped to patient responsibility (bill date)?
- No Pay Days - How many days with no payments on the account do you want before the patient is considered for collections?
- Minimum Resolution Amount - What amount should be left on the collections incident before it is resolved when running the collections process
- Default Activation Wait Days - If a patient has a previous incident resolved, how long of a wait period is needed until they can be put into another incident?
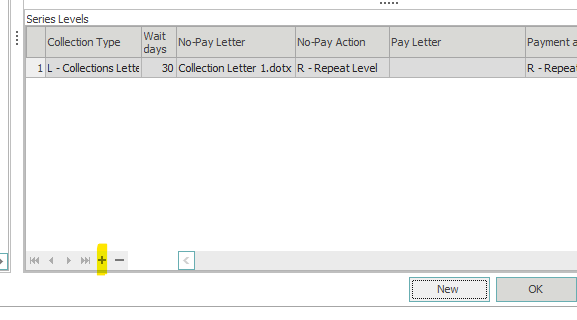
To set up Levels in Series
Under Series Levels - Users can set up several levels so that after a certain time has passed the patient will go to the next level.
To add the first level:
- Level 1 will default to L-Collections Letters. This can be changed to Internal Collections for clients who are not wanting to work their own collections and instead send all balances for collections to outside collections agency. For those wanting to work collections internally before sending to outside collections agency leave L-Collection Letters.
- Wait Days - On the series line is referring to how many days of no payment or payment do you wish to wait before sending to the next level?
- No-Pay Letter - Users can create a collections letter in their document templates to add to the collections series. The first level letter is usually just to inform patients that they have an outstanding balance and will be considered for outside collections if not paid in a certain amount of time.
- No - Pay Action - For users not wishing to only have one level you would set this as N - Next Level. If no payment is made, based on number of wait days on level 1, when the collections process is ran, it will drop the patients into level 2
- Pay Letter - If a payment is made within the set number of wait days users can also create a document in document templates thanking them for their payment and letting them know if there is still a balance outstanding.
- Pay-Action - We recommend setting this to R - Repeat Level so they do not get dropped into collections as long as payments are being made in the balance.
- Users determine how many levels are set up before sending to outside collections agency. If you would like another letter level click the plus sign
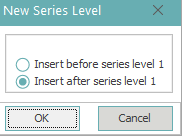
- Click on Insert after series level 1
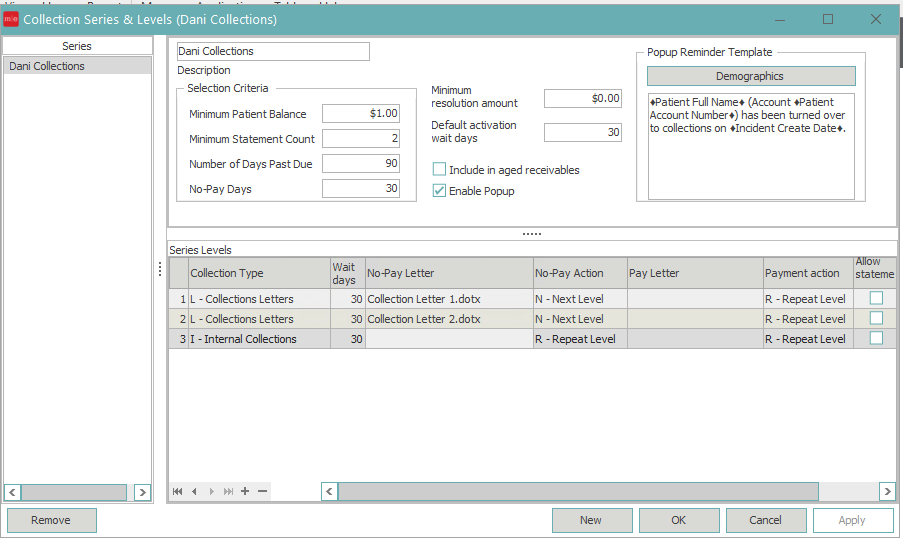
- Then sill in the information on the line, how many wait days before dropping to next level, N- Next Level etc. You will do this for each level and the last level should be internal collections level.
- On Internal Collections Level you will keep the no Pay action as well as the pay action set to R- Repeat Level
- Click on Insert after series level 1
- Check boxes on series lines

- Allow statements - If left unchecked then any balance currently in a collections series will not be printed on the statements.
- Allow statements note - If this box is unchecked and the patient has 200.00 balance currently; if 50.00 is in a collections incident the statement will only reflect 150.00.
-
- In Use - This box is a box that is checked by the system and when checked lets you know that there are open collections incidents for patients in this level. If unchecked on a level then that means there are no patients currently in this level of a collection incident.
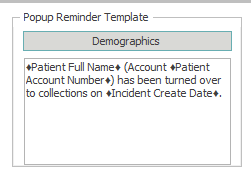
- Allow Popups - If checked it will have a pop up reminder created for the patient accounts that are in this level on the account.
Allow popups - The popup wording can be edited when the patient is put into collections under the PopUp Reminder Template.
- Navigation bar on collections
- Go to first level in collections series (must have collections series level selected)
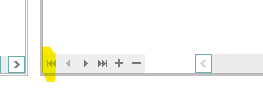
- Go back one level in collections series (must have collections series level selected)
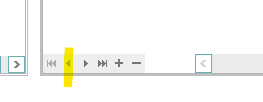
- Go forward one level in collections series (must have collections series level selected)
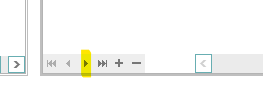
- Go to last level in collections series
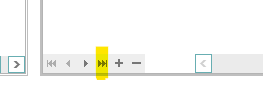
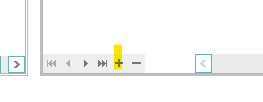
- Add level to collections series
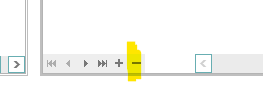
- Remove level in collections series (must have collections series level selected)
- Go to first level in collections series (must have collections series level selected)
- Once all criteria is in place click Apply or OK.
Setting Up Collectors to work collections series
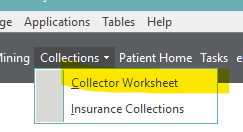
Any transactions that are put in a collections series will go to the collector worksheet under Collections--> Collector Worksheet
In order for them to be listed as a collector and assigned collections incidents to work they must first be set up as a collector.
- Go to Manage-->Collections-->Collectors
- Click new
- Type in their user ID for MedEvolve PM
- Their name should automatically populate if they are already set up in the user section of security
- Fill in the address (the clinic address or outside party working collection address)
- Contract Type
- Uncommissioned - Should be used for internal users at the clinic if they are not getting commission based on incidents
- Commissioned - Users outside the clinic who are working the collections incidents in the PM and receive commission
- Commission Rate - For those working commissioned what is their rate
- Next Contact Days - Default days when working collections incident how many days they should wait for contact
- Once all information is entered hit Apply to save changes and have window stay open. Or click OK to save and exit window.
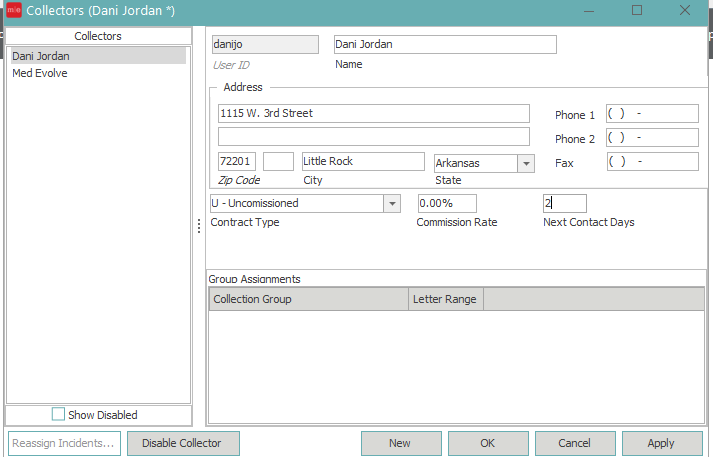
- Reassign Incidents - Will be greyed out unless name is selected with current open incidents. This is used to reassign their collections incidents to a different collector. If selected the following window will pop up
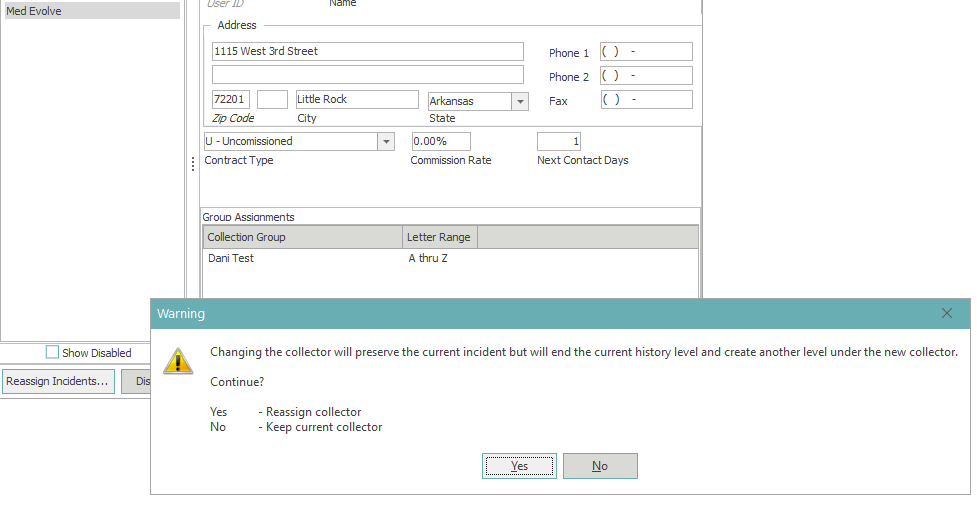
-
- Select Yes to reassign collector and no if you want to keep current collector.
- If Yes is selected the following window will appear.
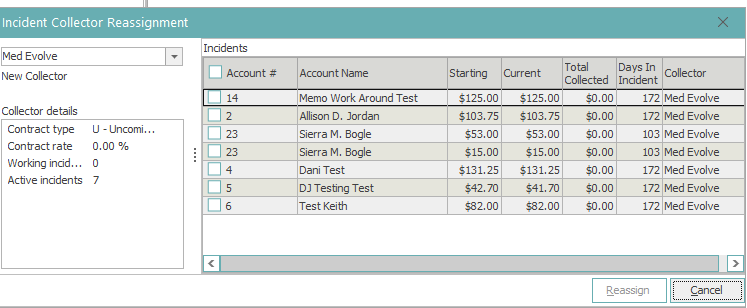
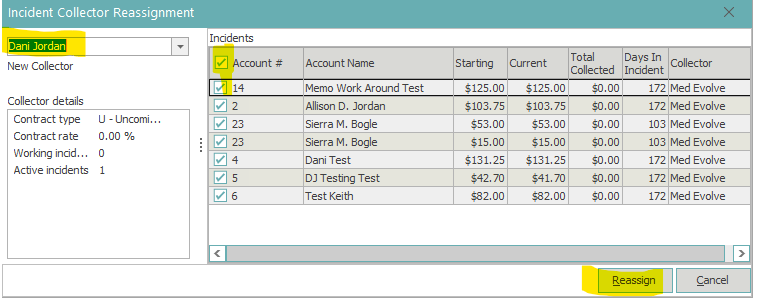
- User can then select all by clicking on the check box in account field it column header or select individually if they need to break it up.
- Then select New Collector and choose Reassign
- If you disable before reassigning incidents the following window will prompt you to reassign the incidents.

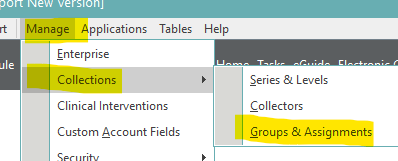
Groups and Assignments
In order to tell the system which providers, locations, and account categories need to be considered for a collections incident, Groups and Assignments will need to be set up and have a collector attached to the group
- Go to Manage-->Collections-->Groups and Assignments
- To create a new group click New
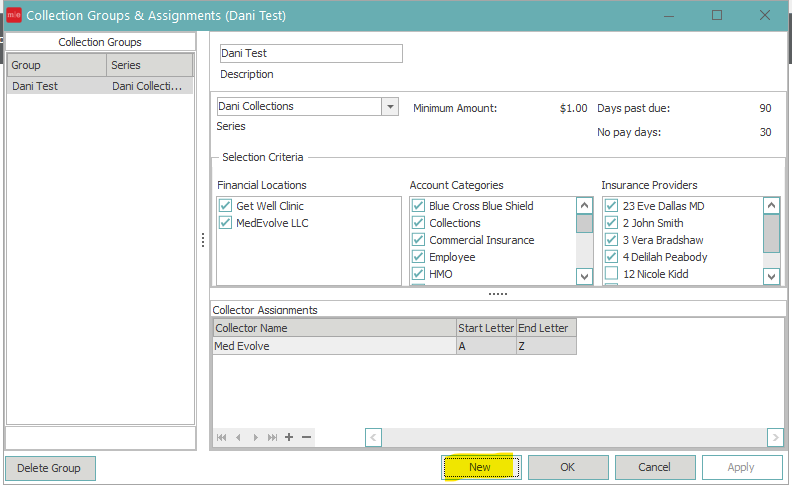
- In Description Type the name of the group
- On Series Field, select the collections series you wish to assign this group to
- Under Financial Locations check the Financial Locations, Account Categories, and Insurance Providers
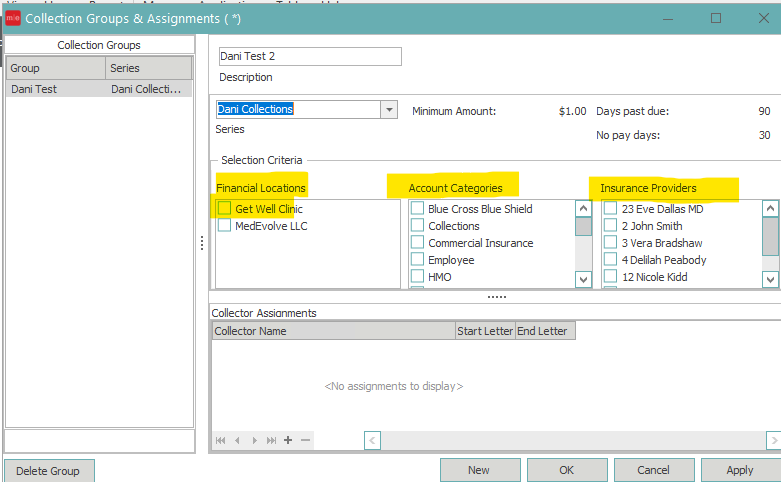
Please note: Two groups cannot have the same set up so if setting up for multiple you will have to change the selections for the groups to be different.
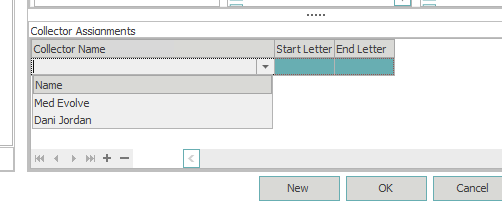
- Under Collector Assignments hit the plus sign
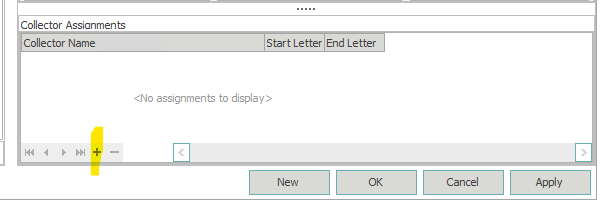
- A line will appear. Click in the collector name section and choose from the drop down the collector (s) that you wish to assign to this group. ALL letters of the alphabet (for patient last name) have to be used. So if only one collector start letter will be 'A' and end letter will be 'Z'.
- If multiple collectors you will split up the alphabet accordingly.
- If multiple collectors you will split up the alphabet accordingly.
- Then select Apply