
All Screenshots taken from playground environment
Enterprise under the Manage Tab is used for setting for the entire enterprise (or database). To access this information
- Go to Manage Tab and Select Enterprise

- The following window will appear
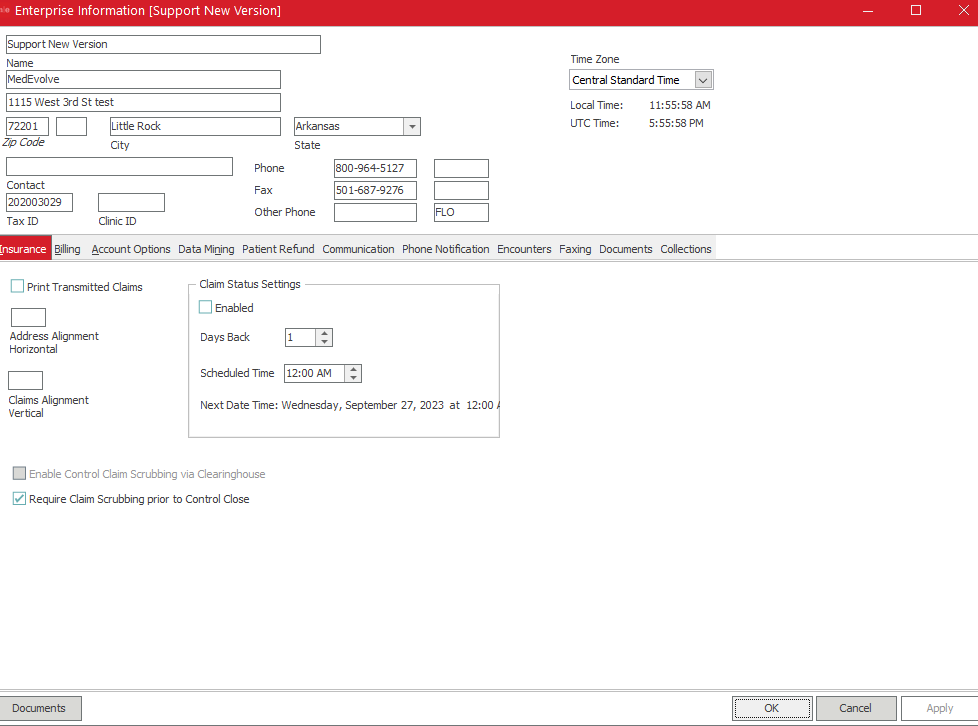
- At the tope of the Enterprise should be the clinic name, address, phone number, tax ID, Clinic ID (this is something that is set up by MedEvolve for certain situations), Fax if applicable, and other phone.
- If printing statements in house out of Medevolve software this information will print on the return address section of statements
- Time Zone - This should be set to the time zone of the main location of the clinic. Users do have to switch it from Standard Time to Daylight time. This time zone affects Patient Messaging if not set properly for clients using our Patient Messaging Module
Documents option
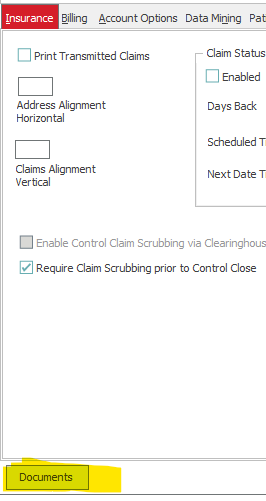
- If there are documents that are set at the enterprise level in document templates they will show here.
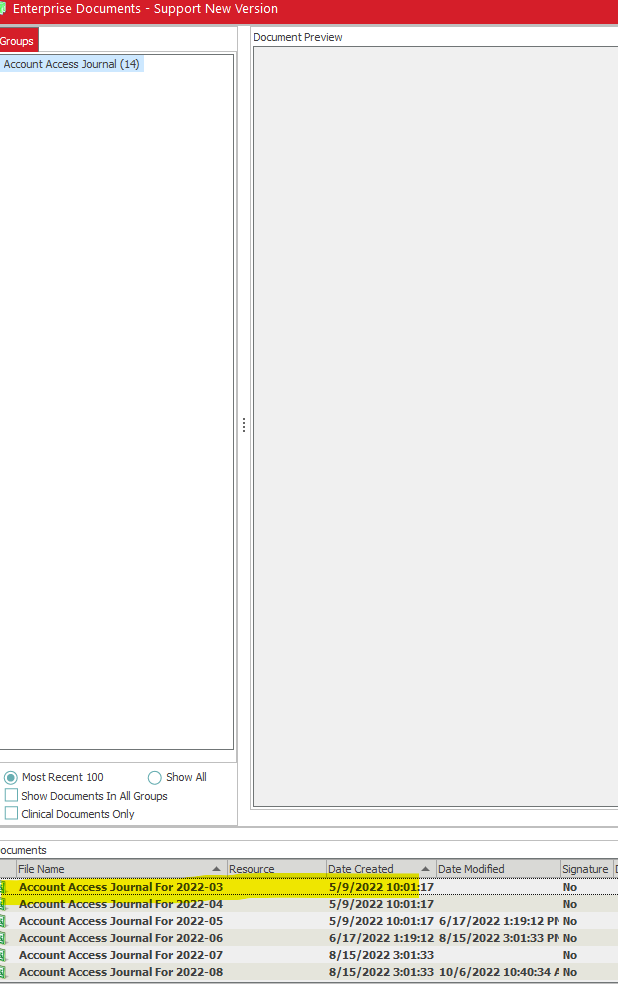
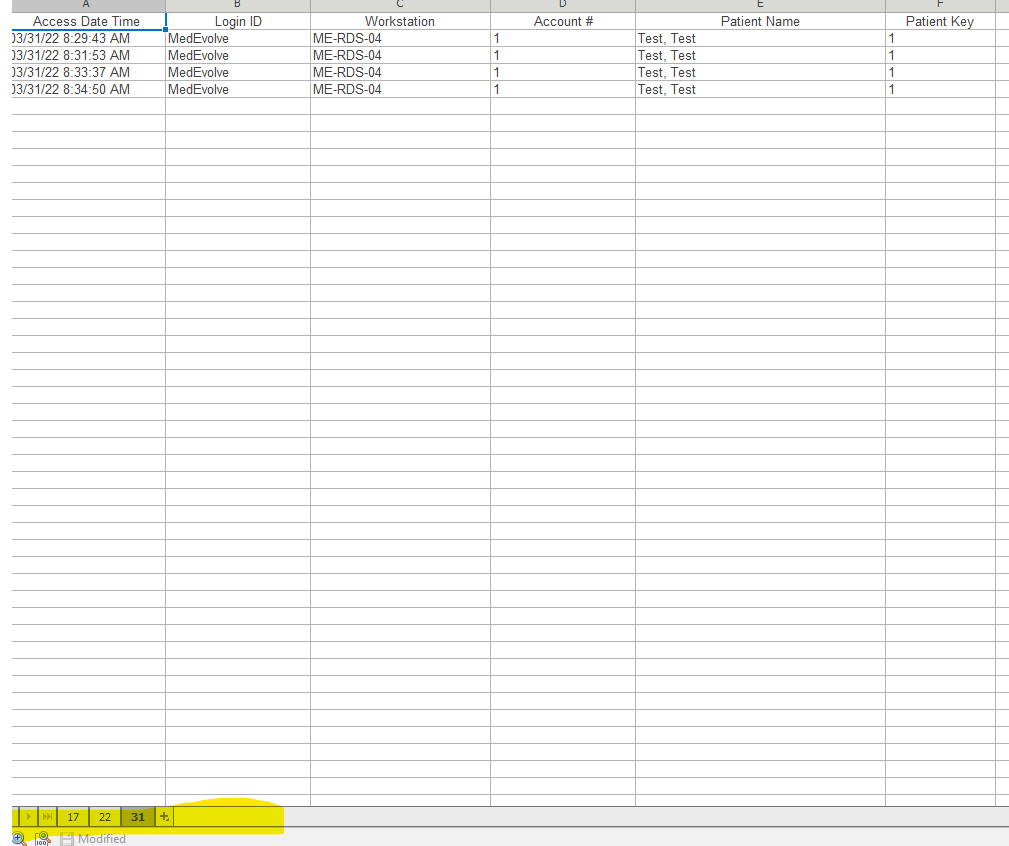
- The most common use is to review the Account Access Journal which runs with the daily process. This will show the information for accounts for which users added, accessed, changed etc accounts. It does this by month. You can see the month date and year under file name. If you double click to select the account access journal, it will open and the days of the month (where there was activity) will have their own separate tab
Insurance Tab
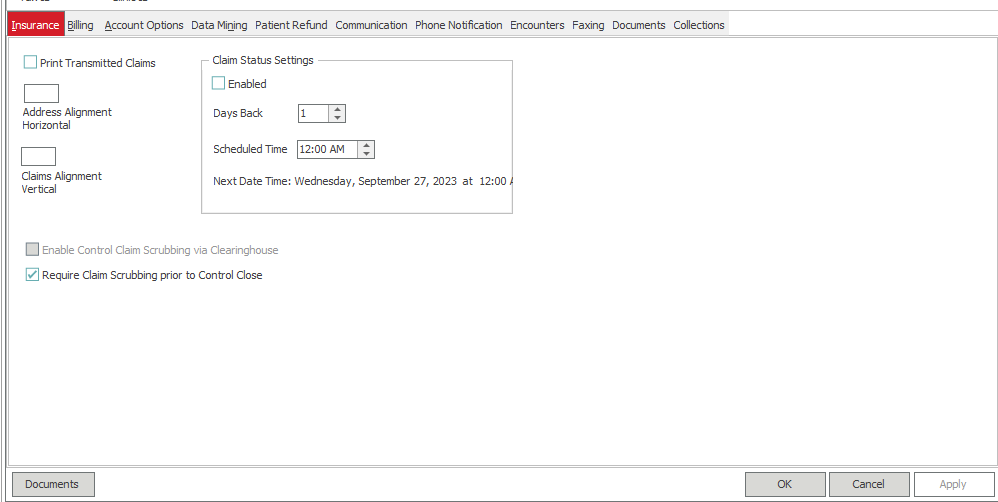
- Print Transmitted Claims
- This option means that it will also print any claims transmitted. We do not recommend this option
- Address Alignment Horizontal
- If printing transmitted claims will change the alignment of claim forms horizontally
- Claims Alignment Vertical
- If printing transmitted claims will change the alignment of the forms vertically
- Claim Status Settings
- Enabled - If checked it will reach out to the clearinghouse and update the claim status in filing history
- Days Back - How many days do you want it to look back for that claim and update based on that time frame
- Scheduled time - What time should it begin to pull the information from the clearinghouse for the claim status
- Enable Control Claim Scrubbing via Clearinghouse - This option is a billable option. This allows the claim scrubbing we have available, to check edits via the clearinghouse to stop the control from being closed before the issues are fixed.
- Require Claim Scrubbing prior to Control Close - This option is not billable and is offered as part of the software. This will scrub against the claim rules set as active under Insurance section Claim Rules. The rule must also be checked to include in claim scrubbing. This will not allow users to close controls before corrections are made to the claims hitting the claim rules.
If users have rights to bypass scrubbing errors even if there are errors for transactions in the control they can close without correcting them. We only recommend billing admins or managers having these rights.
Billing tab
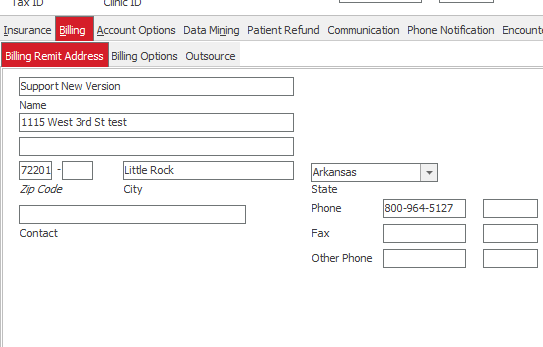
- Billing Remit Address - If printing statements out of MedEvolve PM this address will appear on the statements Remit Address (make checks Payable to)
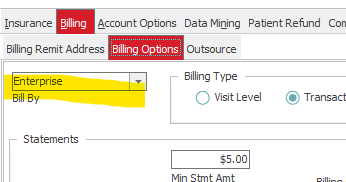
- Billing Options - These options determine how the system will bill patients.
- Bill By - Enterprise or Financial Location
-
-
- If set to enterprise and users are printing statements in house from MedEvolve it will use the name and address listed in the top of the Enterprise for return address and in billing remit Address tab for remit address
- If set to Financial Location and users are printing statements in house from MedEvolve it will look at the financial locations for visits to and use the location table. The top of the location table will be the return address and the bottom of the location table will be used for remit address
- Statement Format for Bill by Financial Location
- If billing by Financial Location there are two options for the Generate Statements report
- Single Report - This will put all statements regardless of the financial location into one report. It will still use the Locations table for the financial location to use name and address but all locations will be mixed together
- Multi Report - This will separate the financial locations into separate location files. Meaning all statements for financial location one will be in one report and all for financial location two will be in a separate report
- If billing by Financial Location there are two options for the Generate Statements report
-
If your clinic is set up to use Instamed to process statements, and if you are billing by Financial location, this must be set to Multi Report. Instamed does not have a way to place separate locations with different names and addresses in the same statement file.
- Billing Type
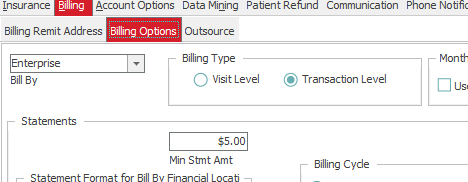
- Visit Level - If set to Visit Level the visit bill status must be set to bill. This means all transactions on that visit must be in bill status
- Transaction Level - If set to transaction level a statement can generate for transactions currently in a bill status with a balance even if other transactions on same visit are still in No Bill Status. This is the setting that is recommended
- Min Stmt Amt - This is the amount for any balance in Bill status to determine if a statement needs to go out. Users can set this at their own preference. Just note if the balance for the transaction or visit is under this amount a statement will not generate
- Month End Restriction
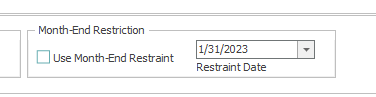
- If Use Month End restraint is checked it will look at the restraint date currently filled in.
- This stops controls from being closed if it is past the restraint date. This ensures that transactions after month end are not closed until month end process has been run. This prevents these transactions from being included in the month end process.
Month End Restraint Date must be manually updated by a user after a month end process has been run to the next date for month end. This is not something that can be set up to automatically run as the monthly process can be ran at any time
- Visits with Zero Patient- Responsible Balance Options
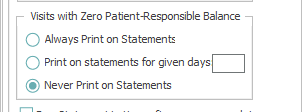
- Always Print on Statements - This will allow visits without patient responsible amount to print on statements
- Print on statements for given days - If you want to show the patients other visits that they are not responsible for now but may be later you can set the number of days it will print on the statement
- Never print on statements - This is recommended setting and will not show any visits that have no Patient Responsible balance on the statement
- Other options
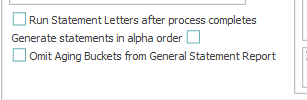
- Run Statement Letters after process completes - Please note this is NOT printing statements. This is if you wanted a letter to go out with statements for different account categories based on aging
- Generate Statements in alpha order - Select this if you want the statements to generate in alphabetical order based on patient last name
- Omit Aging Buckets from General Statement Report - If you do not wish the aging buckets to print on statements printed from Medevolve check this option
- Billing Cycle - There are three options for billing cycle
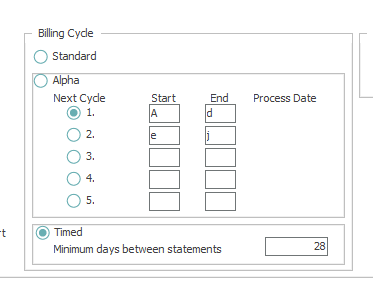
- Standard - Not recommended unless clinics only print statements every once in a while because they do not have a high volume. Standard means every time you run the statements process a statement will generate for every transaction or visit (depending on billing type) that has a balance in Bill Status. So if you run a process once and it generates 100 statements and then run it again same day right after those same 100 statements will print
- Alpha - This Cycle allows users to break up the statements by patient last name in alphabetical order. Users can choose how many letters to break up over 5 lines. They then select which line they want to start with. When the process runs it will print statements for bill balances only if the patients last names begin with the letters in that line. Once process completes it will automatically drop to the next line
- Timed - This setting is the one that is recommended. Users can put in a number of days in minimum days between statements. Even if the statements process runs multiple times a day every day, the patient will not receive another statement until it is past number of minimum days between statements
- Accepted Credit Cards - This only affects users who are printing statements out of MedEvolve and will show the options on the statement generated.
- Outsource Tab -
- This tab is used for setting up the information for auto transmitting statement files to Instamed. It is also used to put users on the notification list to receive emails for processes run (daily, monthly, statements etc) to notify the user if it was successful.
- ePayment vendor: This will be set to Instamed if the client uses Instamed for Statements and payments.
- Account ID - Instamed account ID. Set by Instamed
- Account Password - Instamed Account Password. Set by Instamed
- Merchant ID - Credit Card Merchant ID. Set by Instamed. If bill by Financial Location and financial locations use different bank accounts, this will be set up on Financial Location Table
- Store ID and Terminal ID - set by Instamed. If bill by Financial Location and financial locations use different bank accounts, this will be set up on Financial Location Table
- SSO Alias - Single Sign on Alias. Set by Instamed. If bill by Financial Location and financial locations use different bank accounts, this will be set up on Financial Location Table
- SSO Security Key - Password for SSO Alias. Set by Implementation and Support through Instamed. If bill by Financial Location this will be set up on Financial Location Table
- Provider ID - Provider ID that will appear on statement files transmitted to Instamed if Bill By is set to Enterprise. If bill by Financial Location this will be set up on Financial Location Table
- Client ID - This will be set to MedEvolve
- ePayment Outlets by Financial Location - If different financial locations this option can be checked in order for it to assign to correct financial location and set the information in Location Tables
- Outsource Statement Printing
- Test Mode - Used by Implementation and Support
- Enabled- If checked will allow for auto transmit if auto transmit options are selected
- Auto Transmit Statement File - Will auto transmit the statement file if enabled is checked
- Auto transmit Statement Files for All Financial Locations - If mutli report is selected and bill by is set to financial it will transmit all statement files for all financial locations
- EStatement Vendor - Should be set to Instamed
- Statement Vendor- Should be set to Instamed
- Process Email Notification Lists
- Up to 3 different contacts.
- The contacts will receive notifications for processes completing successfully.
- For statements it will provide the count of statements and payments that are uploaded to Instamed SFTP
- For Daily and Monthly Process it will provide claim counts and show if transmitted.
Account Options Tab
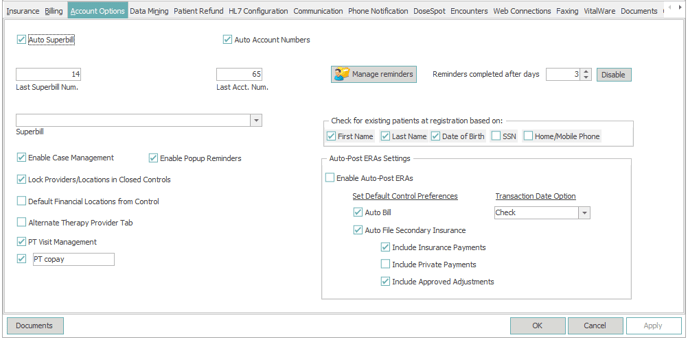
- Auto Superbill
- If practice uses superbills, this option is checked and the last superbill number is filled in when you create a superbill on account it will assign the next number in sequence
- Auto Account Numbers
- If checked and the last acct num. field is filled in when using the Generate Next Account Number on account information window is selected it will choose the next number in sequence when creating the new account
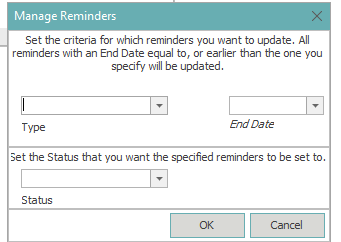
- Manage Reminders - Used for updating account reminders to a different status for ALL account reminders of a certain type in the PM
- The following window will appear
-
- Choose Type of reminders you wish to update
- Standard
- Billing
- Post Op
- Collection
- Eval
- Prescription
- Choose End Date
- This will be the end date of the reminders you wish to change. When selecting a date all reminders withe an End Date equal to, or earlier than the one specified will be updated
- Select the status you wish to update the reminders with that end date (including before that end date selected) and type.
- Active
- Completed
- Cancelled
- Reminders Completed After Days
- If you wish for reminders going forward to automatically complete choose the number of days past the end date on the reminder for when you wish it to resolve
- If disabled is showing in the number field it means it is currently not in use
- If number of days is showing in reminders completed after days it is currently in use
- Check for existing Patient at Registration based on: This is used to assist in making sure duplicate accounts are not created
- Choose Type of reminders you wish to update
The options checked are an AND situation and not an OR. Meaning if multiple are checked ALL criteria must match exactly for it to warn users another account with that information already exists. We usually recommend multiple get selected.
-
-
- First Name - Checks for first name of patients to see if account exists with that first name (please note if one for ex is Chris and the other Christopher it will not match it)
- Last Name - Checks for last name of patients to see if account exists with that last name
- Date of Birth - Checks for Date of Birth on patients to see if account exists with that same date of birth
- SSN - Checks for Social Security Number on patients to see if account exists with that same Social Security Number
- Home/Mobile Phone Number - Checks for Home and Mobile Phone Numbers on patients to see if account exists with the same home or mobile phone number
- Auto-Post ERAs Setting
- Enable Auto Post ERAs - When checked if an ERA can be auto posted entirely without issues it will auto post the ERA into a control
- Set Default Control Preferences - For the ERA that could auto post
- Auto Bill - Will automatically file to primary insurance active on visit
- Auto File Secondary Insurance - If primary payment posted will auto file charges to secondary insurance active on visit
- Include Insurance Payments - Will select Insurance payments to be filed to the next insurance from primary etc
- Include Private Payments- Will select patient payments to be included
- Include Approved Adjustments - Will select adjustments for HIPPA codes and approved writed offs to file to the next insurance
- Transaction Date Option
- Check - Will post the transactions from the ERA (payments and adjustments) with the start and end date of the ERA
- Control - Will post the transactions from the ERA (payments and adjustments) with the start and end date of the control date
-
Patient Refund Tab
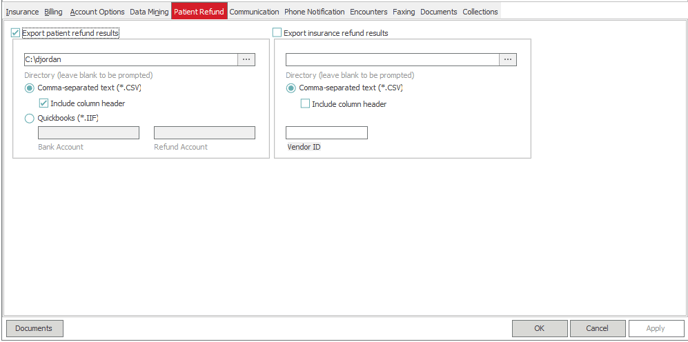
- Export patient refund results - Used for Patient Refunds
- If selected users must choose a folder for the results on the report for refunds process through the Refund Processing Module to be saved to. This report is then sent to the department which issues checks for refunds to patients at the clinic
- Comma - Seperated text (*.csv) - Will export the results in CSV format.
- Include column Header - Needs to be selected to show the output information and what the columns represent
- Quickbooks - NO LONGER USED. Our software is no longer compatible with quickbooks and if this option is checked it will not work
- Export Insurance Refund Results - Used for Insurance Refunds
- If selected users must choose a folder for the results on the report for refunds process for Insurance carries through the refund processing module to be saved to. The report would then be sent to the department which issues checks to insurance payers for refunds to the insurance carriers at the clinic
- comma - Seperated text (*.csv) - Will export the results in CSV format.
- Include Column Header - Needs to be selected to show the output information and what the columns represent
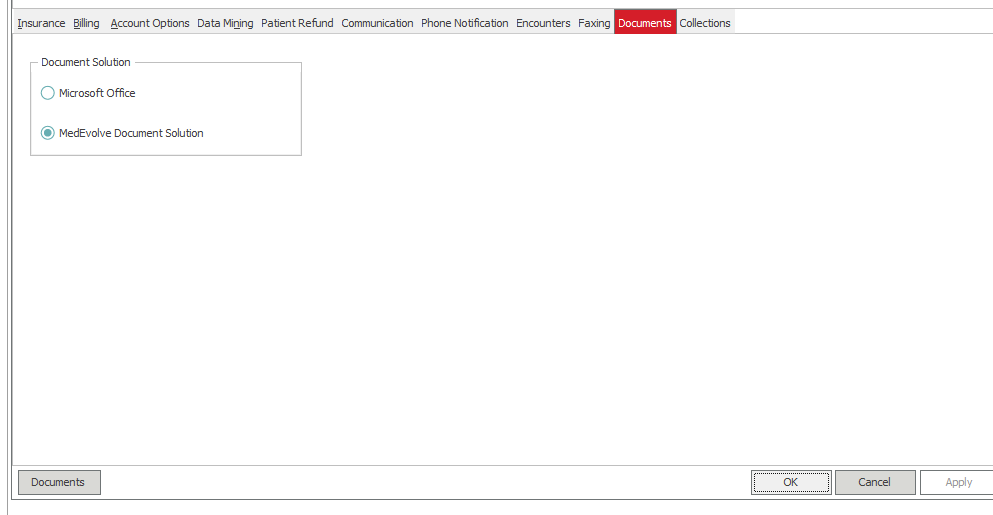
Documents Tab
-
- Microsoft Office - For users that are on Prem (meaning the clinic is on their own server and not the cloud environment) they can choose this option if word is installed on their workstations for documents
- MedEvolve Document Solution - For users that are SAAS (meaning hosted on our Azure cloud environment) this is the only option that they can choose as we do not have Microsoft Office installed in our cloud environment.
Collections Tab
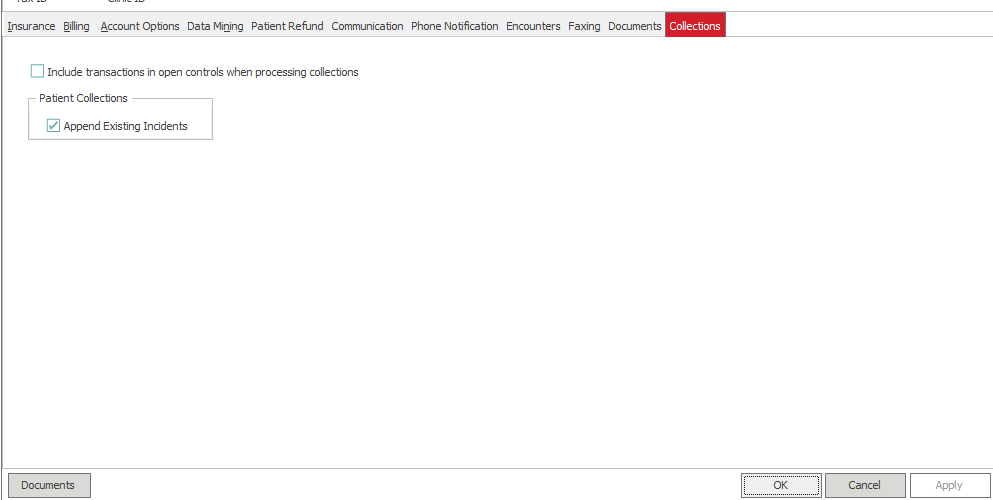
- There are two options under the collections tab
- Include Transactions in open controls when processing collections
- Without this option checked the system will only look at closed controls when the process is ran. Meaning if there is a patient payment in an open control, it will not be considered. Based on how the series and levels for the collections module are set up the payment could prevent the patient from being put into a collections incident.
- Append Existing Incidents
- When this option is checked if a new visit or transaction meets the criteria to be put into a collections incident, it will not create a new incident if another incident previously exists. Instead it will add it to the existing incident.
- Include Transactions in open controls when processing collections