
Enhancements
Financial Clearance Configuration Redesign
MedEvolve has redesigned the Financial Clearance to mimic the Insurance AR Configuration. The same Financial Clearance filters and options are presented in a more organized manner to provide improved navigation and performance. Admins can navigate to Configuration > Financial Clearance > Financial Clearance Worklists.
Upon navigating to the Financial Clearance Workflow Configuration, users will make an action selection to create a new list, edit, clone, or delete list(s). Users can also reprioritize lists more easily, redistribute and perform any of our advanced options to clear worklist, view change history, export history, export selected configuration, export all configurations or to view the priority history.
Action Selection
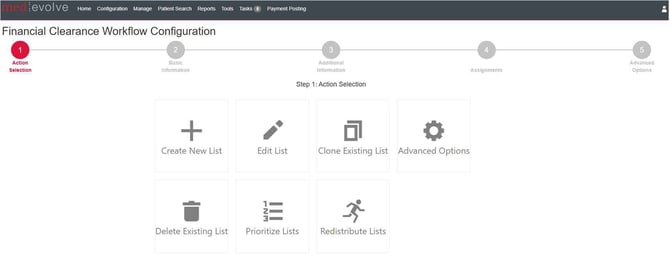
Create New List
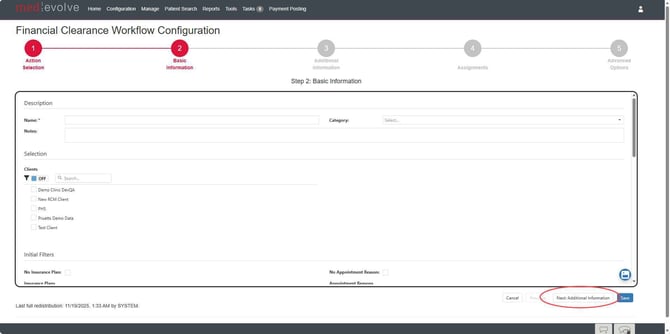
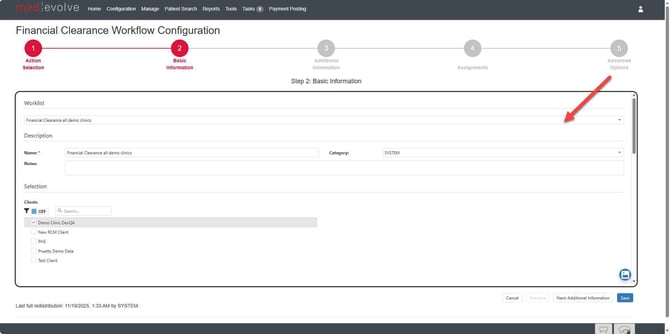
Basic Information When creating a new list, users will enter all basic information such as the worklist name, category, any applicable notes, client selection, insurance plans, appointment reasons & categories, providers, patient categories and financial locations. To advance to the next step, users will then select the Next: Additional Information button to make additional selections.
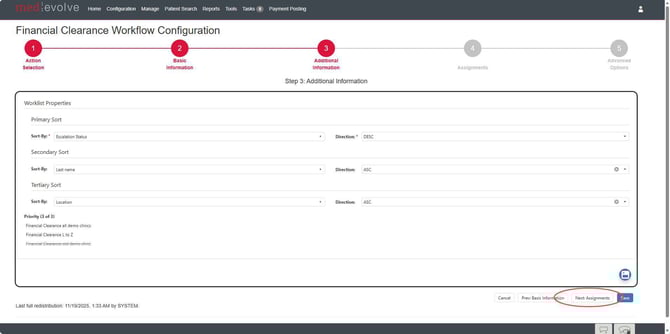
Additional Information
Upon navigating to the next page, admins can select the sort options and reorder the priority of the new worklist. After selections are made, users can then select the next step to make assignment selections.
Assignments
Financial Clearance worklists must contain clearance checks to assign to users. After clearance checks and assignments have been completed, admins can then make advanced filter options.
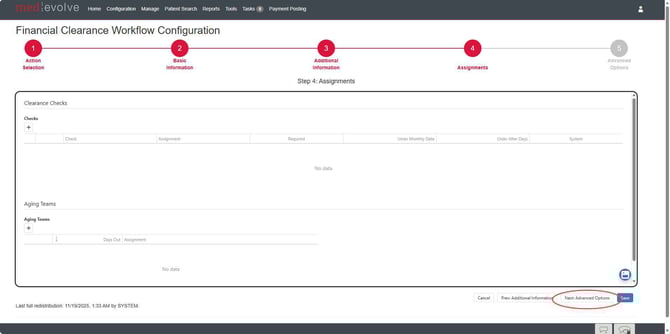
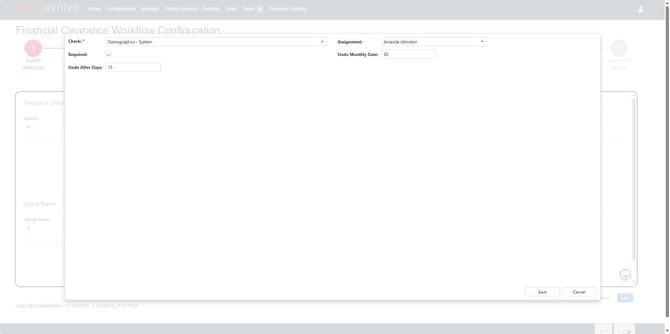
Clearance Checks
Select the insert button within the Clearance Checks grid to add clearance checks as previously accomplished. After making a clearance check selection, select a user or user group within the assignments selection dropdown. Admins have the option to flag the clearance check as high risk or enter values for the Undo Monthly Date &/or Undo After Days. Upon save, the form will close and the clearance check is added to the grid.
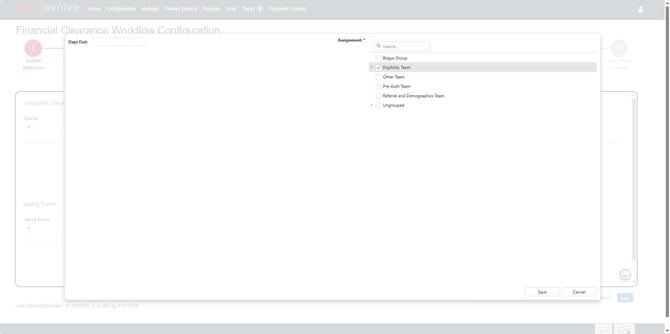
Aging Teams
Aging Teams supersede any user assignment within the clearance check grid. Note all clearance checks within an appointment will be assigned all clearance checks on an appointment since the worklist assignments are load balanced per user. When inserting the first aging team assignment, the days out value is predefined based on the worklist configuration day out value. Subsequent assignments can then be entered as they were previously to assign appointments to multiple Aging Teams.
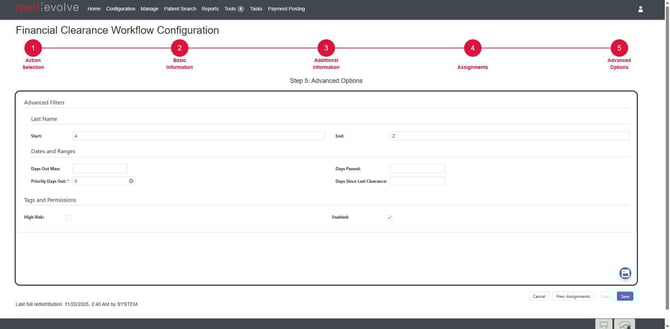
Advanced Options
Within the Advanced Options, admins can make advanced filters options such as last name start/end, appointment date ranges, set priority days out and days since last clearance. The high risk tag can also be set here as well.
Edit List
Users can edit any worklist by selecting the Edit List option from the Action Selection page. Here, users can make any applicable updates to the selected worklist, which will walk them through the same configuration layout as they encountered during creation of a worklist.
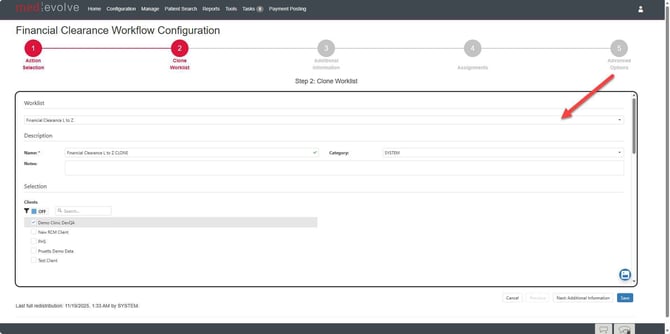
Clone List
Within the Action Selection page, users can select to Clone Lists simply by selecting the tile option. After selecting a worklist to clone from the selection dropdown, users will then enter the name of the new worklist and make any applicable updates prior to saving the new worklist.
Advanced Options
The advanced options contain the ability to clear specified worklists, view change history, export history, export configuration, export all configurations, and view the prioritization history. Admins will first select the intended worklist then select any of the specified advanced options.


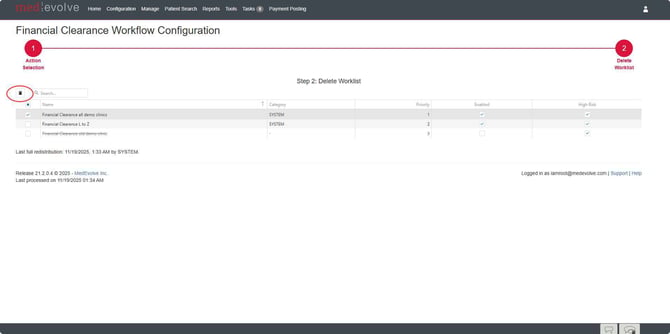
Delete Existing Lists
From the Action Selection, admins can delete worklist(s). We have added the ability to select multiple worklist to delete at the same time as well as the ability to disable/enable worklists and flag as high risk. Select the applicable worklists to be deleted then select the delete icon.
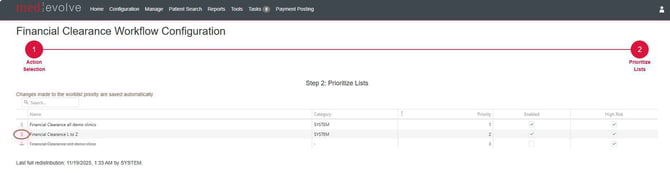
Prioritize Lists
Admins can prioritize lists by navigating to the Prioritize Lists tile where they can drag and drop worklists in the desired order. They also have the option to hand key the priority number directly in the priority column within the grid.
Redistribute Lists
Appointment redistribution now has a centralized place to redistribute all, redistribute unassigned, view history, or view the redistribution report. Here users will also see the totals appointment count among all lists and view the total unassigned appointments.


*Note: The bubbles above the actions can be selected to navigate back to the previous page or advance to next.
Improvements
- Improved performance and efficiency when rebuilding charges during the nightly process
- Refactored rebuilding of Patient AR records for efficiency and performance improvements
- Created an index for follow up dates for performance gains within the nightly process
- Corrected an issue in which only the current worklist view grid reloaded within the Insurance AR worklist view when filtering was applied to the grid and sort & selection is not permitted. All tabs are now reloading as expected.