
Enhancements
Manager and Team Leader Roles
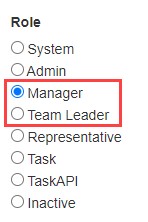
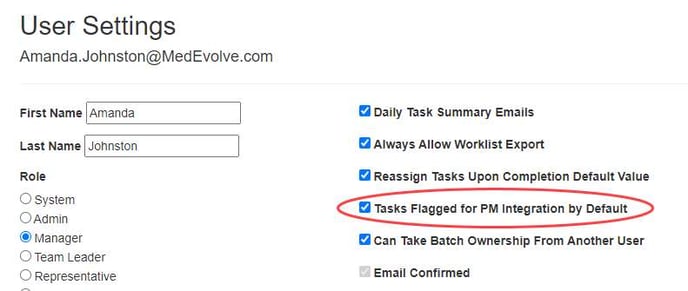
MedEvolve has implemented Manager and Team Leader roles to accommodate mid-level management. The RCD role has been removed with the addition of the two new roles. Team Leaders can be assigned to Managers and Representatives can be assigned to Team Leaders. The hierarchy will allow Managers and Team Leaders to view assigned users stats on the home page summaries as well as any worklists assigned to their team. The role selections are appointed from within the User Settings or upon new user registration.
Managers
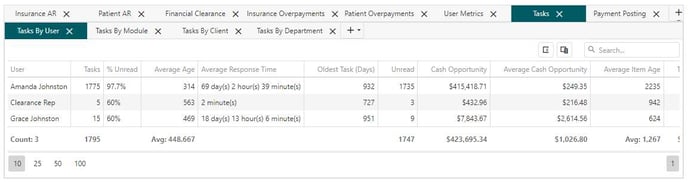
The Home Page summary grid now displays the Managers stats as well as Team Leaders assigned to them and any representative stats that fall within the hierarchy of the team leader that is assigned to the manager.
Team Leader
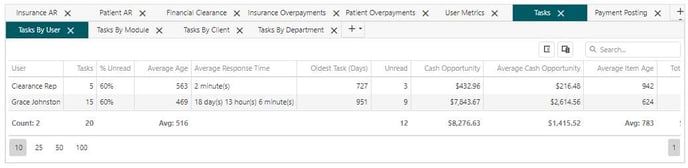
The team lead home page summary now depicts team leaders’ stats along with stats of those assigned to that specific team. All representatives assigned to the specified team leader stats are displayed within the summary tabs.
User Groups
We have added the ability to assign users to groups to accommodate the new Aging Teams tab from the Financial Clearance Configurations. A single worklist can now be assigned to teams, divided up by aging from the appointment date. The ability to assign clearance checks to individual users is still in place; however, if Aging Teams have been assigned, they will override any individual assignments.
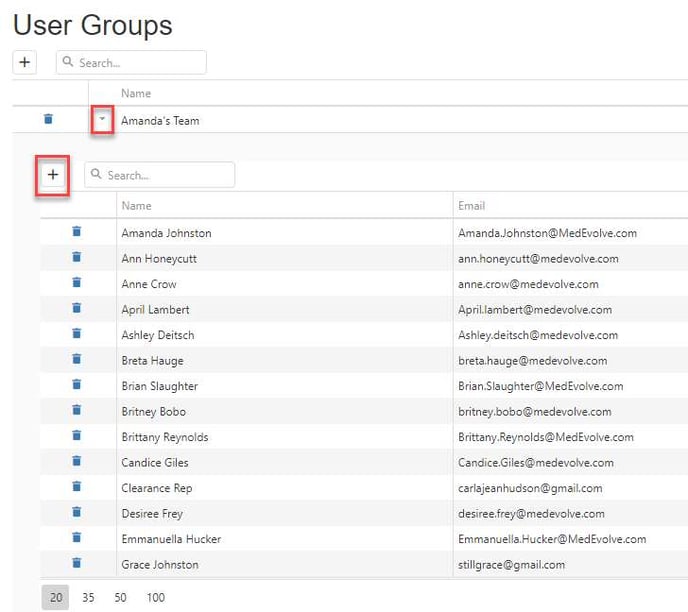
To create User Groups, navigate to Manage > User Groups, select the + to add a new user group.
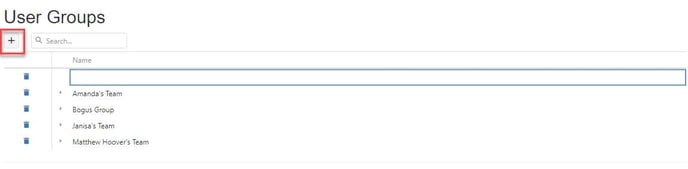
After a User Group has been added, select the arrow next to the User Group Name to add team members. Select the + from the sub-grid to add team members to the user group. Team Members can be updated and removed when necessary.
After User Groups have been setup, admins can then navigate to the Financial Clearance Worklist Configuration to assign User Groups to aging teams. See Financial Clearance Aging Teams below for more details.
Financial Clearance
Aging Teams
Aging Teams have been created to assign worklists to user groups based on Max Days Out. Select a worklist to add the Aging Teams. From the Aging Teams tab, select the + to assign an aging team. The first team in the list will default the Days out value to the max days out that is set on the configuration. For example: if your worklist is configured to 90 days out then the Days Out value of the first aging team is predetermined as that value.
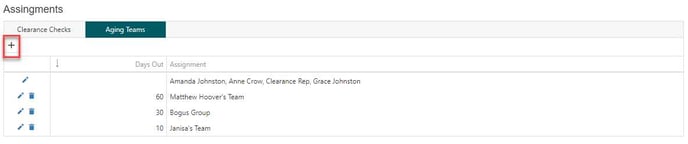
Subsequent Aging Teams do require the Max Days Out to be entered. For example: Matt’s Team is assigned to any appointments that fall within 31 to 60 days. Since the first aging team is set to 90 days out, the first team is assigned to any appointment that falls within 61 to 90 days.

Admins do have the option to select individual user from the User Groups rather than selecting the entire group.
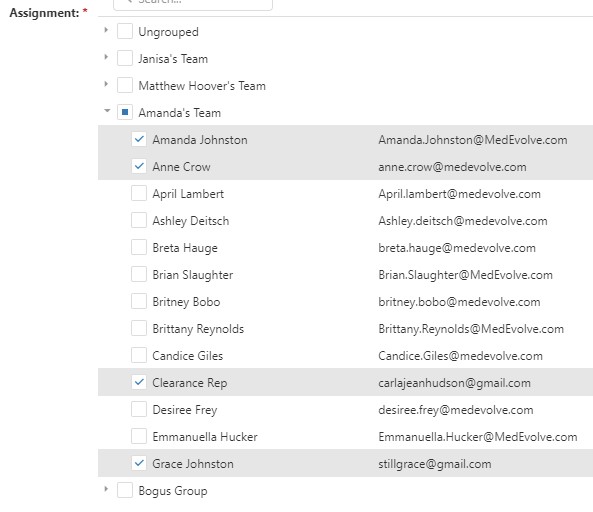
The worklist is then divided evenly among the team.
Undo Clearance Checks: Monthly Date or After X Days
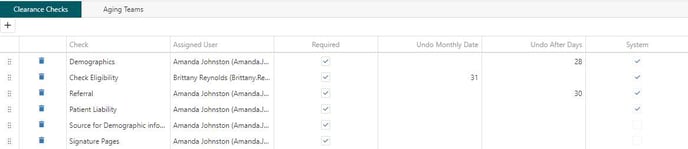
Admins can now set financial clearance configurations to undo clearance checks after a set number of days or to undo clearance checks on a specified date of the month per clearance check.
For example: The clearance check for eligibility below depicts that this clearance check, if cleared, will be reset (marked as not cleared) after the 31st of every month. The Demographic check, is set to ‘reset’ after 28 days from the original clearance.
Past appointments will not be have any checks undone.
Admin Functions
Client Configuration
- Clients are now sorted by name by default
Dictionary
- Users can now maintain claim remark codes from Configuration > Dictionary > Claim Remark Codes
Insurance AR Configuration
- Admins can now create Insurance AR Configurations using Claim Remark Codes
Users
- Moved Users configurations setting to Manage > Users
- Added option to default PM Integration Flag upon task creation based on users settings
All User functions
Financial Clearance Worklists
- Managed Visit are now displayed in red/bold font when they are expired
- Added In-Progress flag to the current worklist view tab. This check will be automatically set to true, indicating when one or more checks are cleared. Insurance AR Worklists
- Financial Location and Service Location are now displayed on the Action tab
Payment Posting
- Client Name is now present on the Batch Selection/Creation form when processing ERA transactions
- Added option to clear filters and groupings to the batch transaction grid
- Payer ID can now be updated for a single ERA rather than updating on the Insurance Plan
Tasks
- Users now have the ability to mark a Task as ‘Unread’ when the task is assigned to them
- Tasks viewed by users not assigned to them no longer get marked as ‘Read’
- Now defaulting PM integration flag if enabled in user settings
Improvements
- Financial Clearance Custom Checks List are no longer presenting an error when user attempts to enter a duplicate custom check list name
- Users can now enter subsequent Financial Clearance Custom Check Lists without error
- No longer showing the System flag on the Admin Home Page Financial Clearance Summary by Worklist tab
- Corrected an issue where username and password that was saved to users’ browsers would auto-populate in email and password fields
- Read/Unread flag no longer reflects as ‘read’ if the user viewing the task is not the assignee
- Payment Posting module is no longer accessible to clients that do not have Payment Posting enabled Expired Managed Visits now display in red font and the expired flag is now accurately reflected when Managed Visit is expired
- Checking managed visits for number of visits allowed vs used – if number allowed is equal to or less than used then font will be red
- Home page summary for Insurance AR worklist by client tab no longer times out when loading the tab
- Insurance AR action code now saves on apply or next, user no longer has to select the action code a second time
- No Insurance Payment flag on claim now takes into account non $0 payments
- Payment Posting Payment Queue transaction grid no longer reflects option to select AJ transaction type
- Visit grids now displays visit transactions for accounts in which only one visit is present
- Control Options can now be selected from all places in which a new batch can be created within the Payment Posting module
- Batch control options can now be edited prior to submitting batch