
Enhancements
Payment Posting Module
MedEvolve has created a new module to facilitate the posting of payments and adjustments. The new Payment module is available to MedEvolve PM Clients using PM version 8.1.14 or greater.
Within the Posting module users can process payments and adjustments, review and process ERAs, and payments or adjustments received from a 3rd party via the Posting Inbound queue. Once transactions are posted into WF batches, the batches can be reviewed and submitted to the PM. Once submitted, controls are opened within the PM and automatically closed.
Admin Functions
User Settings
To utilize the Payment Posting module, users must have the payment posting module enabled either from the Manage Users grid or User settings page.
Additionally, workflow users will have to validate their PM credentials to ensure batches can be submitted to their PM. Admins can then allow user to take ownership of other users’ batches by selecting Can Take Batch Ownership from another User flag.

Validating Practice Credentials
By selecting the insert button under Practice Credentials, the user will be prompted to select Client and enter their MedEvolve user then enter your PM credentials. Once user name and password have been entered a verify button will appear. Select Verify, once verified, user can save their practice credentials to add to their User settings.
![]()
Once the credentials are validated, a green check mark will appear within the Practice Credentials grid. If the user cannot be validated, a red X will be present and user will have minimal access to work within the Payment Posting module since the users actions cannot be written back to the PM.
Home Page
From the Home Page Payment Posting tab, Admins can view open batches and totals.
All User functions
Home Page
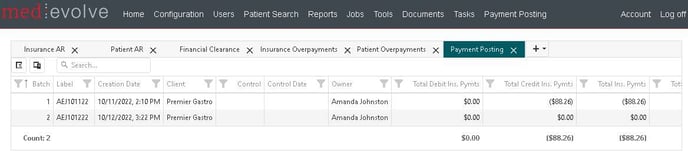
The Payment Posting Summary tab has been added to the user home page on the bottom summary grid. There, users can view their open batches for a quick overview of the batch totals.

Select a batch to navigate to the Payment Posting Module or select the Payment Posting menu option.
Batches
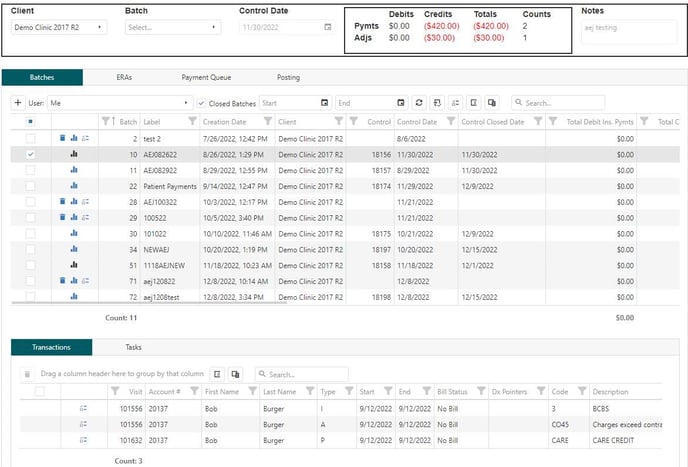
Upon navigating to the Payment Posting module, users will arrive on the Batches tab. This tab contains a grid with the user’s current open Batches. This may be for multiple clients.
All users have the ability to filter the batch list to view all users’ batches or select individuals. Users can also view closed batches by selecting the closed batches flag.
There are multiple filter options, allowing the user to include closed batches, set a date range based batch closed date, or select other users batches to view. If the user has the additional security, they may take ownership of another user’s batch.
Users can create new batches, by selecting a ‘Create New’ button. This will set the create date as the current date, set the current user as the ‘Batch Owner’ and provide a text box for the user to add a description for the batch. The batch description allows alpha and numeric characters. This description will be preceded by the batch key for unique identification.
Highlighting or selecting a batch will display the transactions for the batch in a grid at the bottom of the form in addition to a Task sub-tab with any related tasks.
From the Transactions grid, users have the option to update or remove transactions. Additionally, tasks can be added to batches. From the task tab, users can add and view open tasks associated to the selected batch as they in the other modules.
Creating a new Batch
When creating a new batch, Users will assign a Control date and control options. Once set, each newly opened batch will default these settings from the previous batch opened by the user.
Control options include:
- Auto Bill
- Auto-File secondary insurance
- Include Insurance Payments
- Include Private Payments
- Include Approved Adjustments
Users with the specific user option to ‘Take Ownership’ will have the ability to select a Batch currently ‘owned’ by another user and ‘Take Ownership’ of the batch, placing it in their name to edit and close.
If the current user does not own the batch, they can still add a batch note or create a batch task, but cannot edit any transactions or properties related to the batch.
Users can open new batches from this tab, as well as any of the other posting tabs.
Batch Submission (Close Control)
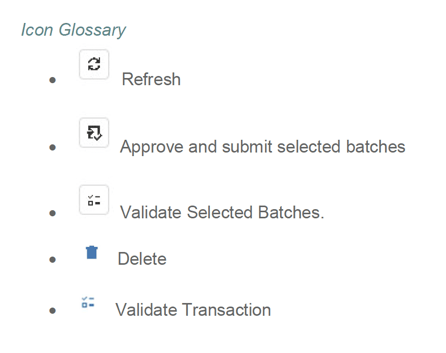
After validating batch totals, users will approve and submit the batch or batches. If a user selects more than one batch to submit, they will each be written back to the PM in their own control. Upon submitting the batch, a pop up will appear for user to verify the batch they are submitted.

Upon selecting submit, a batch submission popup will appear to notify user of the status. Once it has been successfully submitted, the information containing the PM control number will be displayed.

ERAs
As users select to the ERA tab, users will see a list of all unprocessed ERAs for the client selected. Users can also utilize the search to quickly search find a specific check.
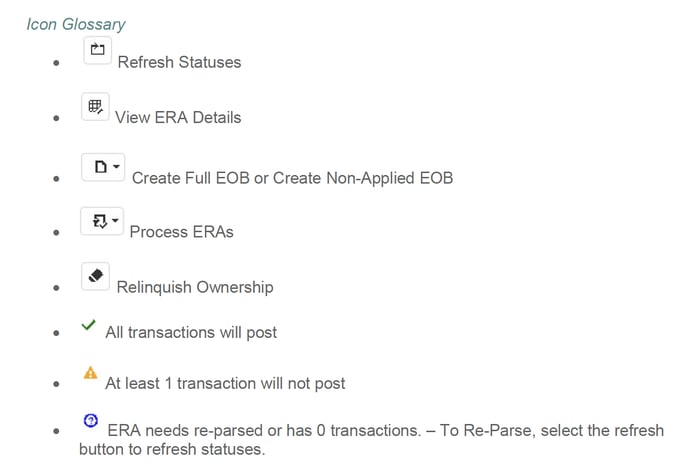
There is also an option to ‘Show processed’ check. The status on each ERA reflects a green check mark when all transactions will post without further attention. Users can select to process those ERAs directly from this grid by selecting the icon to process ERAs which gives the user to process the selected ERA or all cleared ERAs on the page. Checks with the yellow triangle indicate there are one or more transactions on the ERA that need attention. Users can get a quick glimpse of the number of denials on the check directly from the ERA grid as well. The user name is displayed within the grid and well as the associated batch number if ERA has been processed.
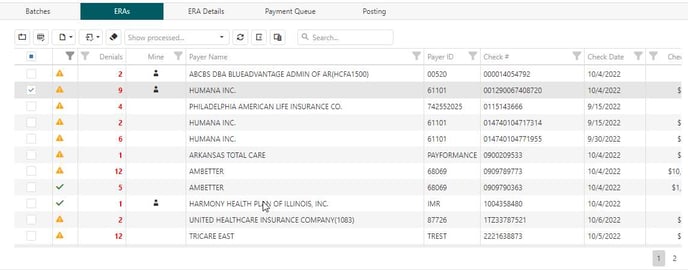
Users can view processed ERAs from the past by selecting show processed and entering a date span then selecting refresh.

ERA Details
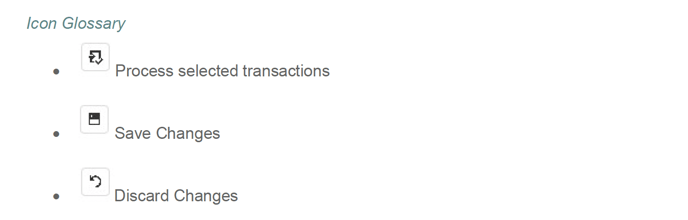
After selecting a check from the ERA tab then navigating to ERA Details, users can make updates, select transactions to process, and view denials and adjustments. Users can select the patient name or account number hyperlink to navigate to patient view demographics by selecting the visit ID. Users will traverse to the patient view billing tab to view/update visit details. Selecting the patient insurance plan hyperlink will display the insurance plan information as a quick reference to view the insurance plan phone number, payer ID and other details. User can also set the transactions to apply or not. After updating the transactions, users will need to save changes prior to processing selecting transactions.

After desired transactions are selected, users will select the process icon. From the process ERAs popup, users can select a specific batch or opt to create a new batch. Users can select “use check date” rather than entering a transaction date if preferred. The pay type field remains an optional field, which is utilized for some reporting.

Payment Queue
Much like the PM Inbound Queue, users can process payments into a batch. After selecting the desired payment file, transactions can be linked to visits to post payments. Users can select the account number hyperlink for a quick link to Patient View.
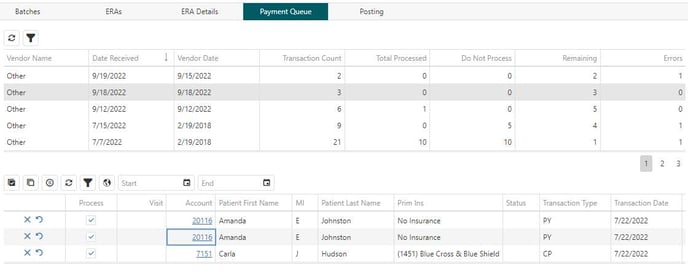
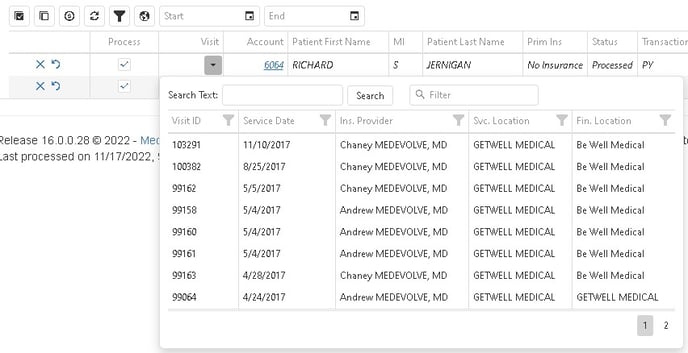
Transactions are linked to visits within the built-in search feature by selecting a visit.
Select desired payments to process then select the coin icon to create Payments. Users have the option to create a new batch upon processing transactions if do not already have a batch selected. If a new batch is preferred, users will complete the following details as displayed below.

Posting
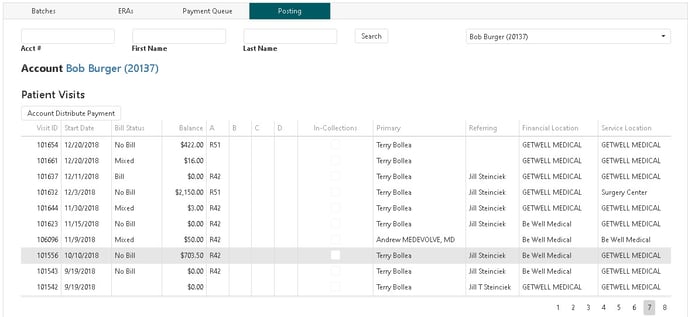
From the Posting tab, users can enter transactions and COB information from the transaction grid after they have selected an account and visit. Users can view Visit Details or Visit Insurances as they do in other modules by expanding each of the links.
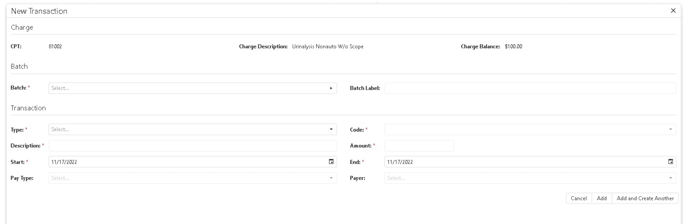
Once a visit has been selected, the transaction grid will render to display all related transactions where users can manually enter P, I, A, PP, II, and AA transactions by selecting the enter New Transaction icon. Users will then select a batch from the Batch dropdown or select to create a new bath. After users completes the transaction details they then have the option to Add the transactions or they can select Add and Create.
Another to add an additional transaction.
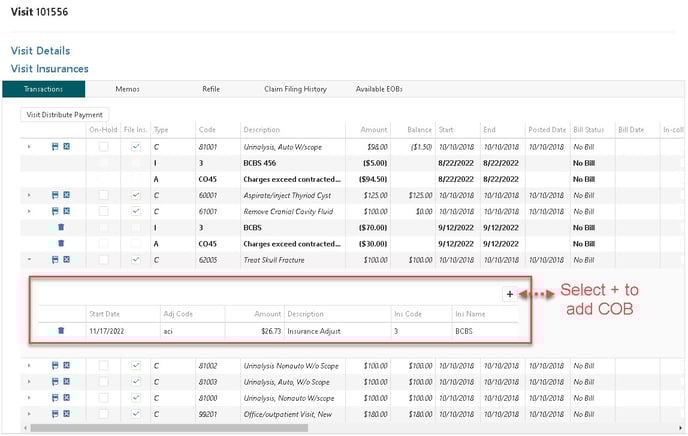
COB transactions can be entered by expanding the applicable charge and selecting the +.
To quickly post payments (Insurance or patient) or adjustments, user can utilize the Account or Visit distribution buttons.
Additionally, Users can add & view memos, select visits/transactions to refile, view the claim filing history or view available EOBs by navigating to the applicable tabs.
Improvements
- Fixed an issue where electronic payment financial location picker was not working as expected when the PM is set to bill by Financial Location
- Claim Distribution history grid is now rendering as expected
- Creator is now able to close tasks flagged to reassign upon completion
- Tasks created by Task Users will now be completed when the reassigned after completion is not enabled
- WF tasks are now visible within the PM
- Patient Overpayment User Productivity Report is now populating the patient account status
- Action Codes Configuration min or max follow up date can now we updated and deleted
- No longer presenting an error when attempting to run the account ledger report
- Sub-Category List is now rendering after updating the Category on Tasks
- Resolved an error when generating the Redistribution Detail report from Insurance & Patient Overpayment worklists
- Financial Clearance appointments are now redistributed to the appropriate worklists