
SETUP TAB
Go to Applications on the MedEvolve toolbar and select Eligibility.
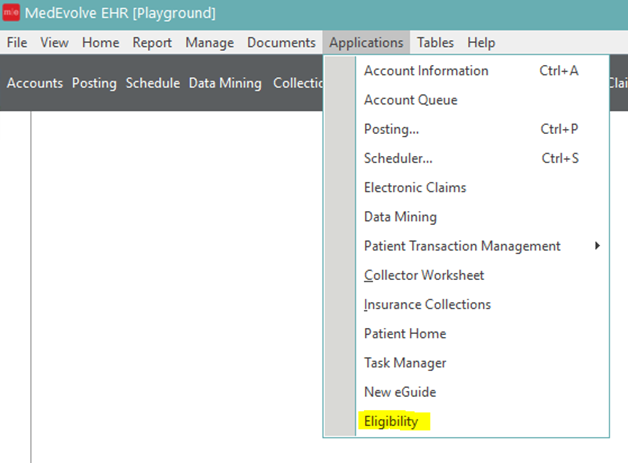
Once the Eligibility application appears, select the setup tab.
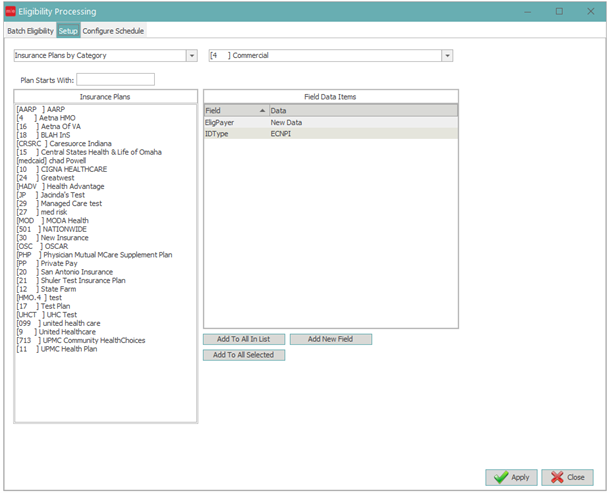
Inside the setup tab, there will be two drop down boxes and two windows.
![]()
-
The first drop down gives the user four different options by which to display the insurance plans. We recommend using Insurance Plans by Category.
-
The second drop down allows the user to select the insurance categories they want to setup.
-
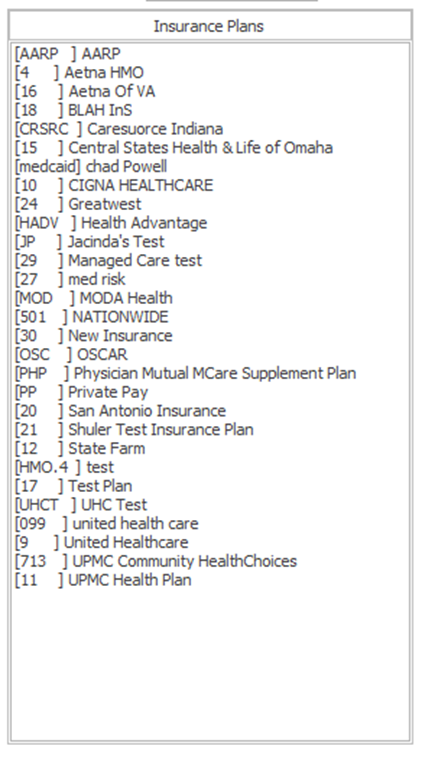
Once selected the window to the left will display all insurance plans in the selected category.
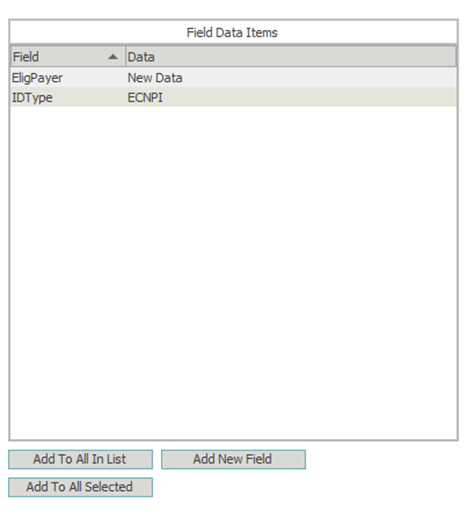
The window to the right has to be created by the user.
-
Select the button labeled “Add New Field” Twice
-
Click the drop down arrow in the first field that was added to the data area and select EligPayer
-
EligPayer will be the 5 digit eligibility payer ID number obtained from Practice Insight Payer Listing report
-
- Click the drop down arrow in the second field that was added to the data area and select ID Type
- ID Type will be ECNPI (Electronic Claims National Provider Identifier)
- Click Apply to save your changes.
**HINT: When setting up multiple insurance plans that share the same payer ID number, the user can select them all prior to the setup, then hit the button labeled “Add To All Selected” EX: Cigna, Aetna**
**NOTE: Not all payers participate in electronic eligibility processing. If that payer does not participate, you will not be able to locate an eligibility payer id in Practice Insight.
BATCH ELIGIBILITY TAB
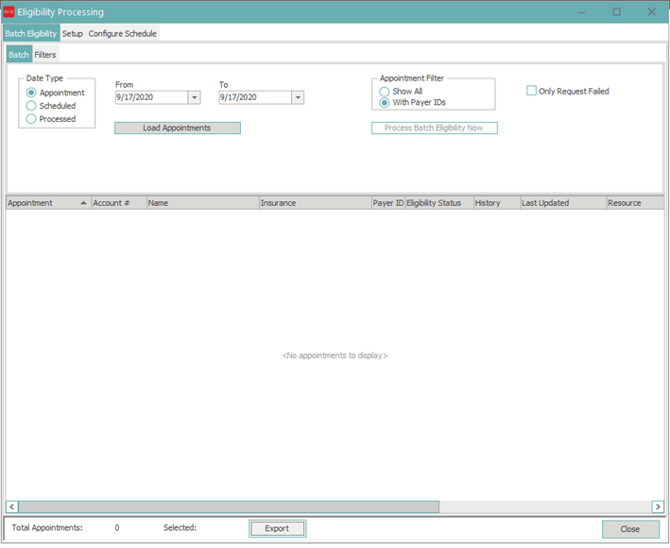
Once the Eligibility application appears, select the Batch Eligibility tab.
-
Select the Appointment Date(s).
-
Click the Load Appointments button. All patients with appointments for selected date(s) will display.
-
Once desired patients have been displayed, click “Process Batch Eligibility Now” button to process eligibility for selected patients.
-
**NOTE: if an auto process has been configured, you will not need to click Process Batch Eligibility Now.
-
-
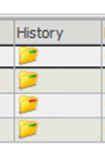
Click the Load Appointments button again to refresh. Once processing is complete the response results can be viewed by double clicking on the folder in the History column in the Account Visits screen.
Things to Note:
-
All columns can be sorted if you click on the header.
-
You can filter the report by clicking the Filter tab at the top.
-
You can export this to a excel document by clicking Export at the bottom of the screen.
-
You can also view the eligibility results from the patients account insurance screen by clicking on Last Updated.
CONFIGURE SCHEDULE TAB
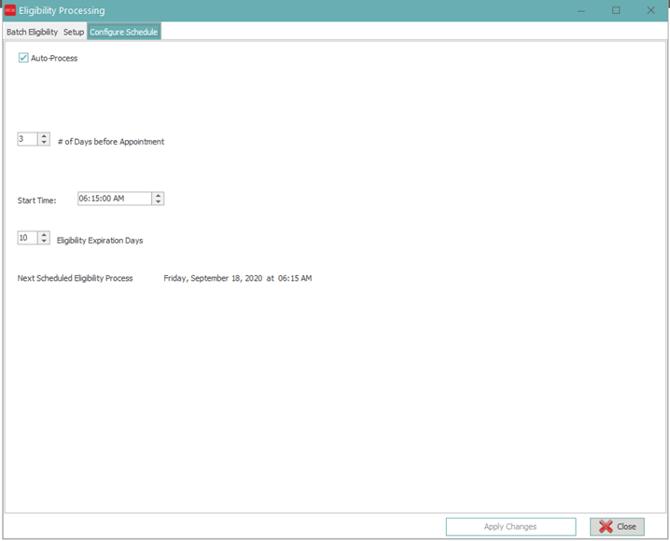
Once the Eligibility application appears, select the Configure Schedule tab.
-
□ Auto-Process – the checkbox is used to enable and disable the auto processing of batch eligibility.
-
# of Days before Appointment – this number will specifiy how many days prior to a scheduled appointments the eligibility will run.
-
Start Time – the time the batch eligibility process will begin.
-
Eligibility Expiration Days – Will expire the auto-processed eligibility after X many days to include this patient in future auto batch eligibility processes.
-
Next Scheduled Eligibility Process – the date that the next auto eligibility process will occur.